To visit this site you must be of legal drinking age in your country of residence.
If there is no legal age for consuming alcohol in your country, you must be an adult. By entering the website, you are aware of the obligation and you agree to the terms of use.
Enter
Terms of use
1. Introduction
Maison Mirabeau is wholly owned by Mirabeau SAS a registered company in France (RCS : Draguignan 519 607 907 N° Siret :51960790700036).
Use of this website and the services provided via it are conditional upon you accepting the following terms and conditions. Unless otherwise specified, your acceptance of this User Agreement shall be indicated by your use of and/or registration with maisonmirabeau.com (formerly mirabeauwine.com). The website is provided by Mirabeau SAS and its suppliers (“we”/”our”/”us”). These terms and conditions and our Privacy Policy, (together the “User Agreement”) form our entire agreement with you in respect of non-chargeable use of maisonmirabeau.com and supersede any prior agreement or arrangement with you in respect of maisonmirabeau.com. If a company name is inserted in your registration request, then the User Agreement shall be between us and that company and accordingly unless the context otherwise requires, references to “you” and “your” in this User Agreement shall also be to that company. The purchase of [goods/services] from us is subject to our Terms and Conditions of Purchase. If there are any updates to this User Agreement or to the Terms and Conditions of Purchase, we will bring this to your attention on the home page of maisonmirabeau.com.
2. Availability of maisonmirabeau.com
We will endeavour to ensure that maisonmirabeau.com is available 24 hours per day without any interruptions. However, we reserve the right to make maisonmirabeau.com unavailable at any time or to restrict access to parts or all of maisonmirabeau.com without notice. maisonmirabeau.com is a general information service. We will endeavour not to make it misleading, but we cannot represent that the information accessible on or via maisonmirabeau.com is accurate, not-misleading, complete or up to date.
3. Use of maisonmirabeau.com
maisonmirabeau.com is designed for your personal, non-commercial use and you must not use it (or any logos, trademarks or other brand information) in any other way without our consent. Except as permitted under applicable law, you must not use, copy, translate, publish, licence or sell maisonmirabeau.com or any materials or information in maisonmirabeau.com or the structure, overall style and program code of maisonmirabeau.com without our consent. If you wish to make a request for consent, please contact contact@mirabeauwine.com.
4. Your Contributions
You agree to only use maisonmirabeau.com for lawful purposes and that any information that you provide in connection with, or which forms part of maisonmirabeau.com will be, as far as you are aware, true and accurate and will not infringe any copyright or trade mark, or any right of privacy, publicity or personality or any other right, whether registered or unregistered, of any other nature or any person, or be obscene or libellous or blasphemous or defamatory and you agree to indemnify us against all claims, proceedings, damages, liabilities and costs, including legal costs arising out of your breach of this term. We cannot make any assurances about the information or contribution made by any other user and you should exercise caution before acting or otherwise relying upon any information you obtain via the maisonmirabeau.com.
5. Rules for Competitions
From time to time Mirabeau runs competitions across various platforms including but not limited to maisonmirabeau.com, our social media accounts and various third-party websites. Winners are chosen by Mirabeau and closing dates, where applicable, are stated on the competition form. All competitions are open to anyone over the legal drinking age in your country of residence. Prizes that include wine will only be delivered to an address that is permitted and feasible through our distribution channels or can be collected from the Mirabeau Wine Shop in Cotignac, France. Any entrant responses may be used on social media or in our marketing channels. Winners will be notified via the same platform where the competition was held. No cash prize alternatives. If no confirmation is received from the winner(s) within 14 days, we reserve the right to award the prize to an alternative winner.
6. Links
maisonmirabeau.com includes links to other internet sites. Without limiting what we say elsewhere, we make no representations or warranties about those sites or their content, nor that the links work. If you wish to link to maisonmirabeau.com.com you may only do so at www.maisonmirabeau.com. Details of our linking arrangements may be obtained from contact@mirabeauwine.com.
7. Data Protection
It is your responsibility to ensure that that you give us an accurate and valid e-mail address and other contact details and tell us of any changes to them, however we cannot make any assurances about any other user you may meet using the maisonmirabeau.com. We comply with all applicable Data Protection laws in the UK. For a description of how we use your personal data, please see our Privacy Policy.
8. Intellectual property
maisonmirabeau.com, its style and structure, and the materials and information on maisonmirabeau.com of maisonmirabeau.com are protected by copyright and other intellectual property rights, and may not be used by you unless you have our prior written permission. The authors of the documents in maisonmirabeau.com assert their moral rights. Mirabeau, Esprit de Mirabeau, Comte de Mirabeau and La Comtesse de Mirabeau are trade marks of Mirabeau SAS.
9. Our Liability
Since a substantial part of maisonmirabeau.com is both free and available to all, it is a condition that your use of maisonmirabeau.com is at your own risk. We shall not be liable to you or in breach of this User Agreement for any delay or failure to perform any obligation if the delay or failure is due to a cause beyond our reasonable control including, without limitation, the blocking or restricting of information to and/or from our network.
Except as expressly provided in this User agreement, we disclaim any further representations, warranties, conditions or other terms, express or implied, by statute, collaterally or otherwise, including but not limited to implied warranties, conditions or other terms of satisfactory quality, fitness for a particular purpose or reasonable care and skill.
Save as provided below, we disclaim all and will not be liable in contract, tort (including, without limitation, negligence) or otherwise arising in connection with this User Agreement or the maisonmirabeau.com for: (i) consequential, indirect or special loss or damage; or (ii) any loss of goodwill or reputation; or (iii) any economic losses (including loss of revenues, profits, contracts, business or anticipated savings), in each case, even if we have been advised of the possibility of such loss or damage and howsoever incurred.
Our maximum liability to you in contract, tort (including, without limitation, negligence) or otherwise arising in connection with this User Agreement or the maisonmirabeau.com shall be limited to £50. Notwithstanding any other provision of this User Agreement, we will be liable to you without limit for any death or personal injury caused by our negligence and to the extent that liability arises under Part 1 or section 41 of the Consumer Protection Act 1987 and for liability arising from statements made fraudulently by us.
10. Small Print
Either of us may terminate this User Agreement at any time. You may not transfer any of your rights or delegate any of your obligations under this User Agreement without our prior written consent. If we fail to enforce any provision of this User Agreement, that failure will not preclude us from enforcing either that provision (or any similar provision) on a later occasion. Nothing in this User Agreement shall confer on any third party any benefit or the right to enforce any term of the User Agreement. This User Agreement is governed by English law and any dispute connected with this agreement is subject to the exclusive jurisdiction of the English courts. Nothing in this User Agreement affects your statutory rights as a consumer.
11. Complaints
If you believe that your intellectual property or other rights are being infringed by the maisonmirabeau.com, or if you are dissatisfied with maisonmirabeau.com or any aspect of our service, in the first instance please contact contact@maisonmirabeau.com.
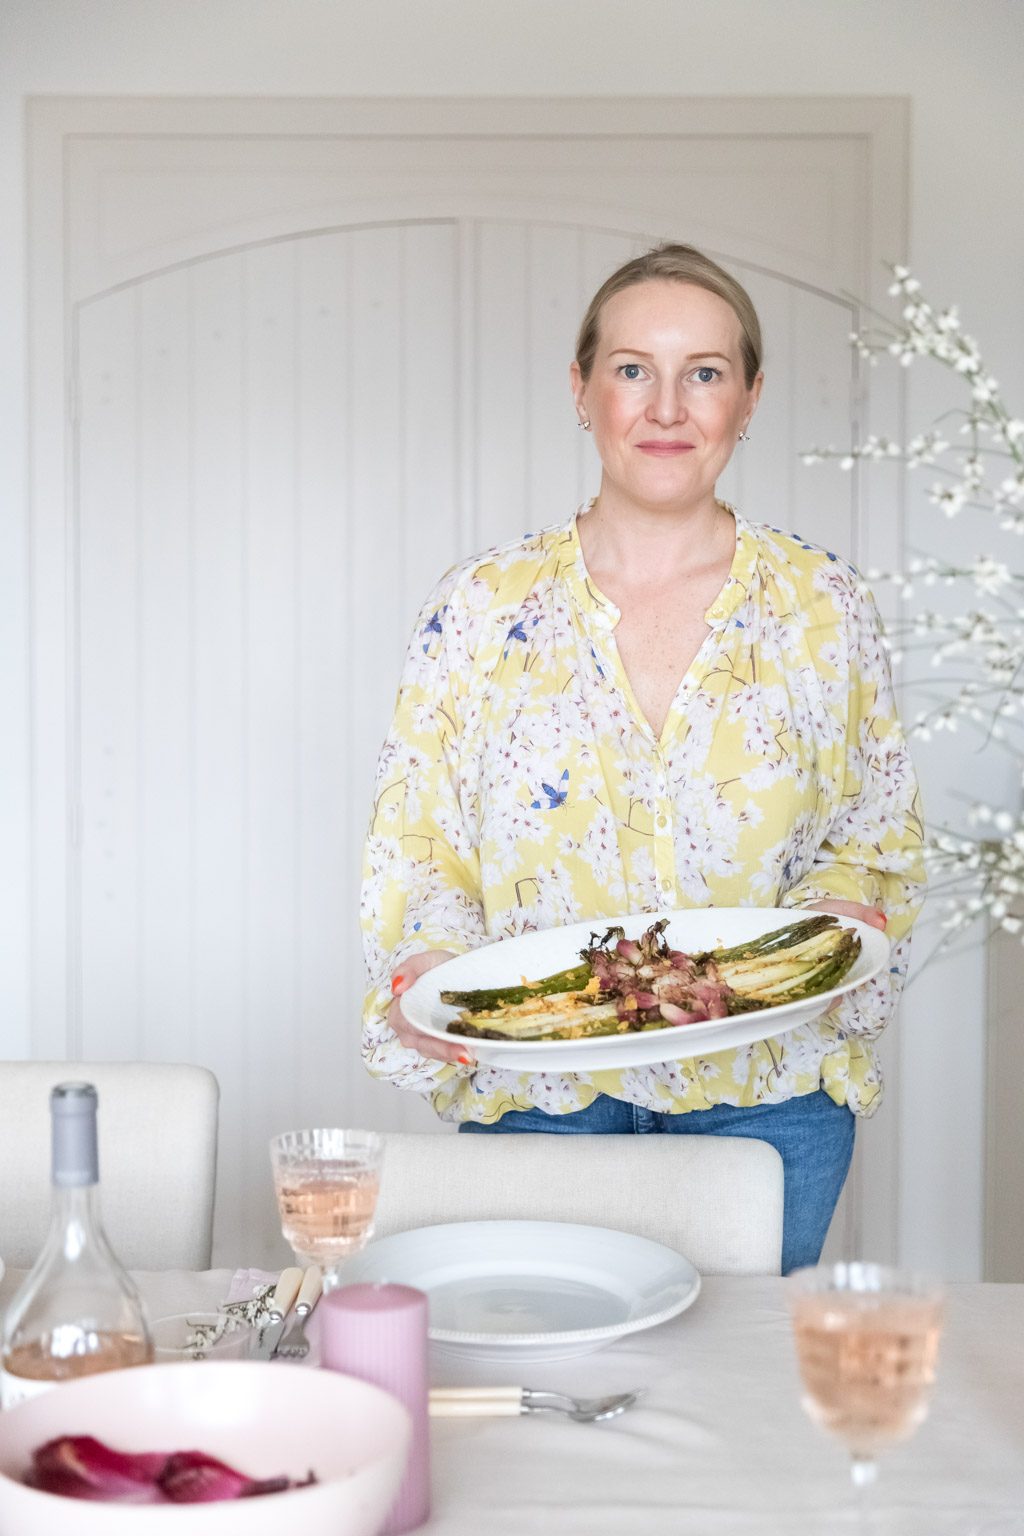
A few weeks ago, we had the pleasure of hosting the lovely Gemma Wade here in Cotignac. Gemma is a fantastic cook, who transforms fresh, simple ingredients into delicious dishes in no time!
Gemma’s recipes and tips are inspired by the reality of cooking in a home kitchen with children underfoot and the rest of life being juggled around it. Find out more about her meal plans and recipes, supper clubs and cooking classes at yousaytomatocooking.com and follow her on Instagram @gemcwade.
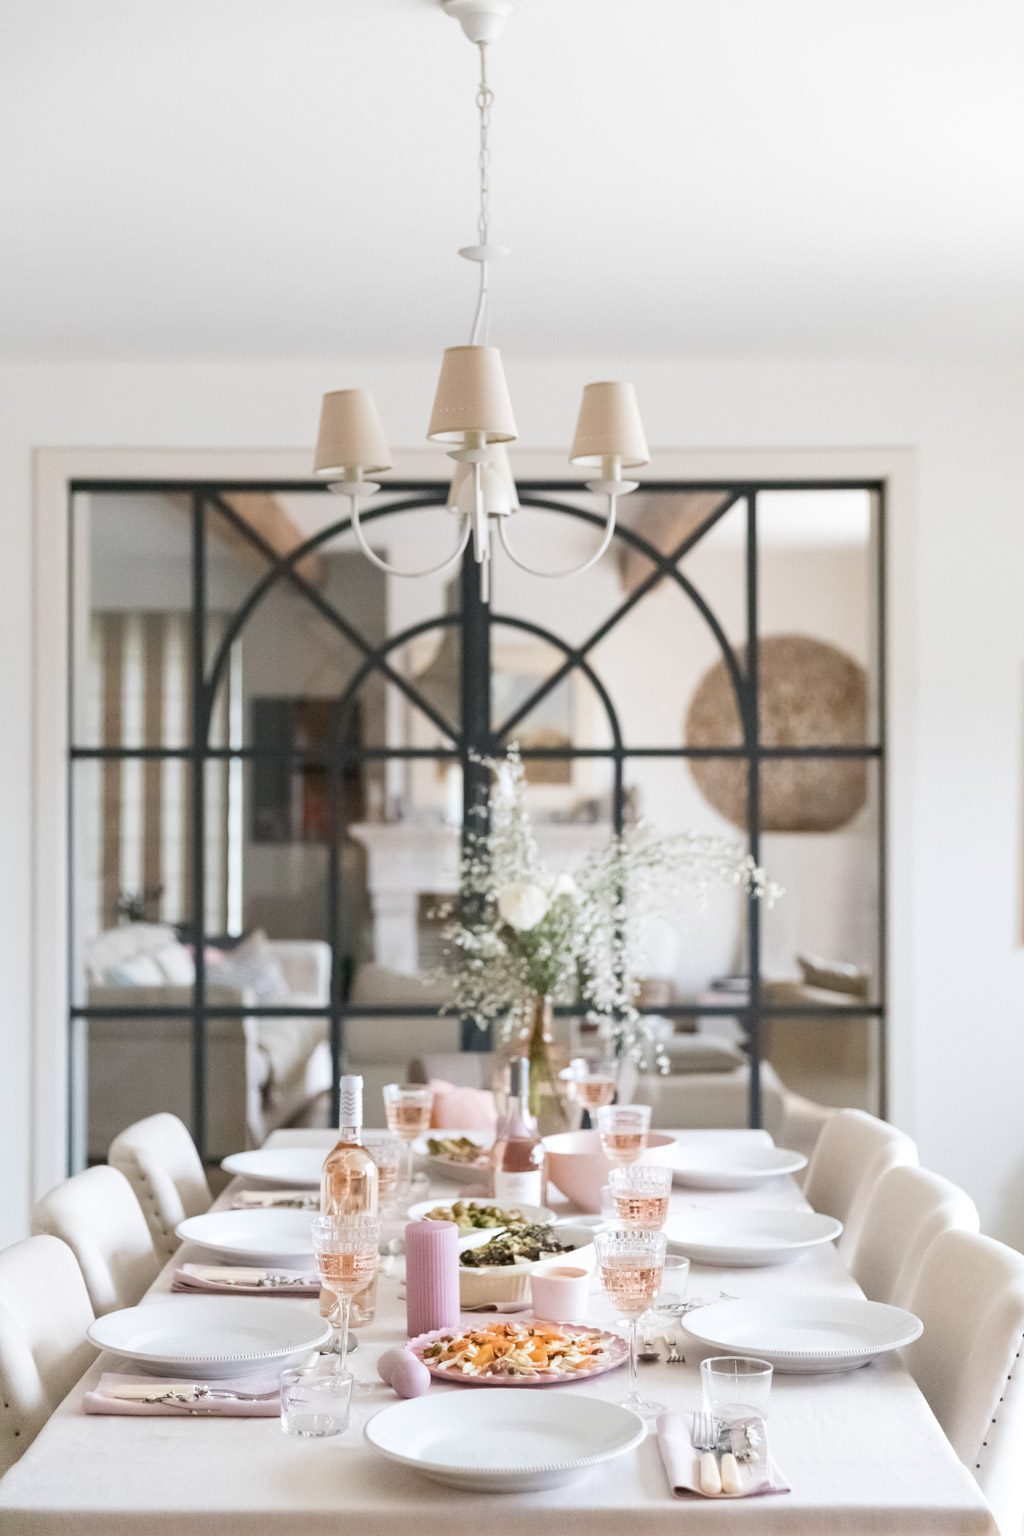
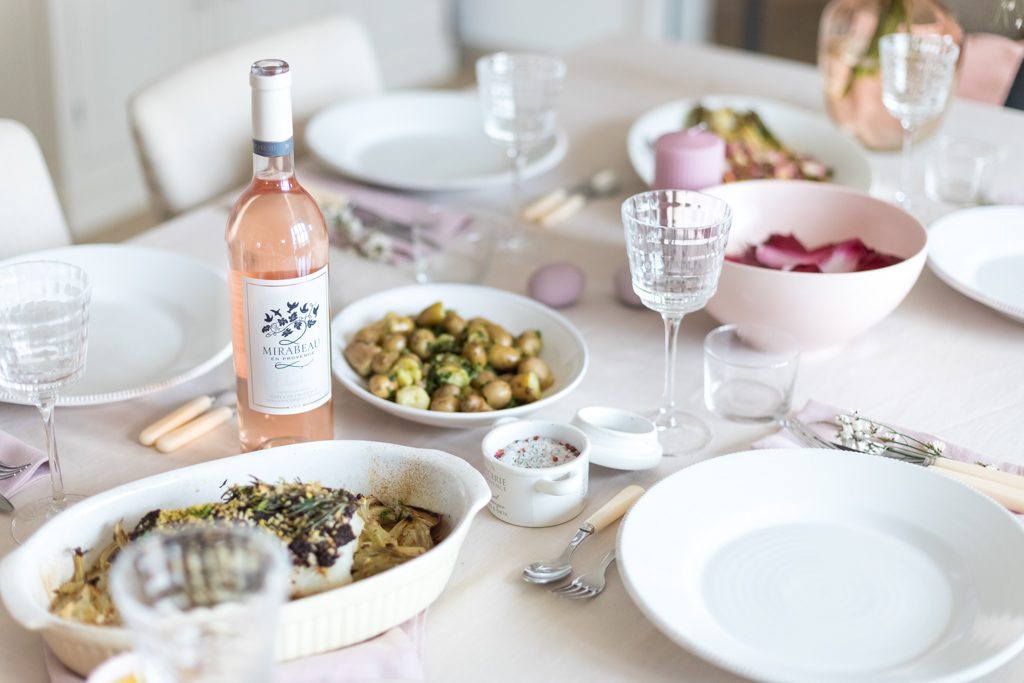
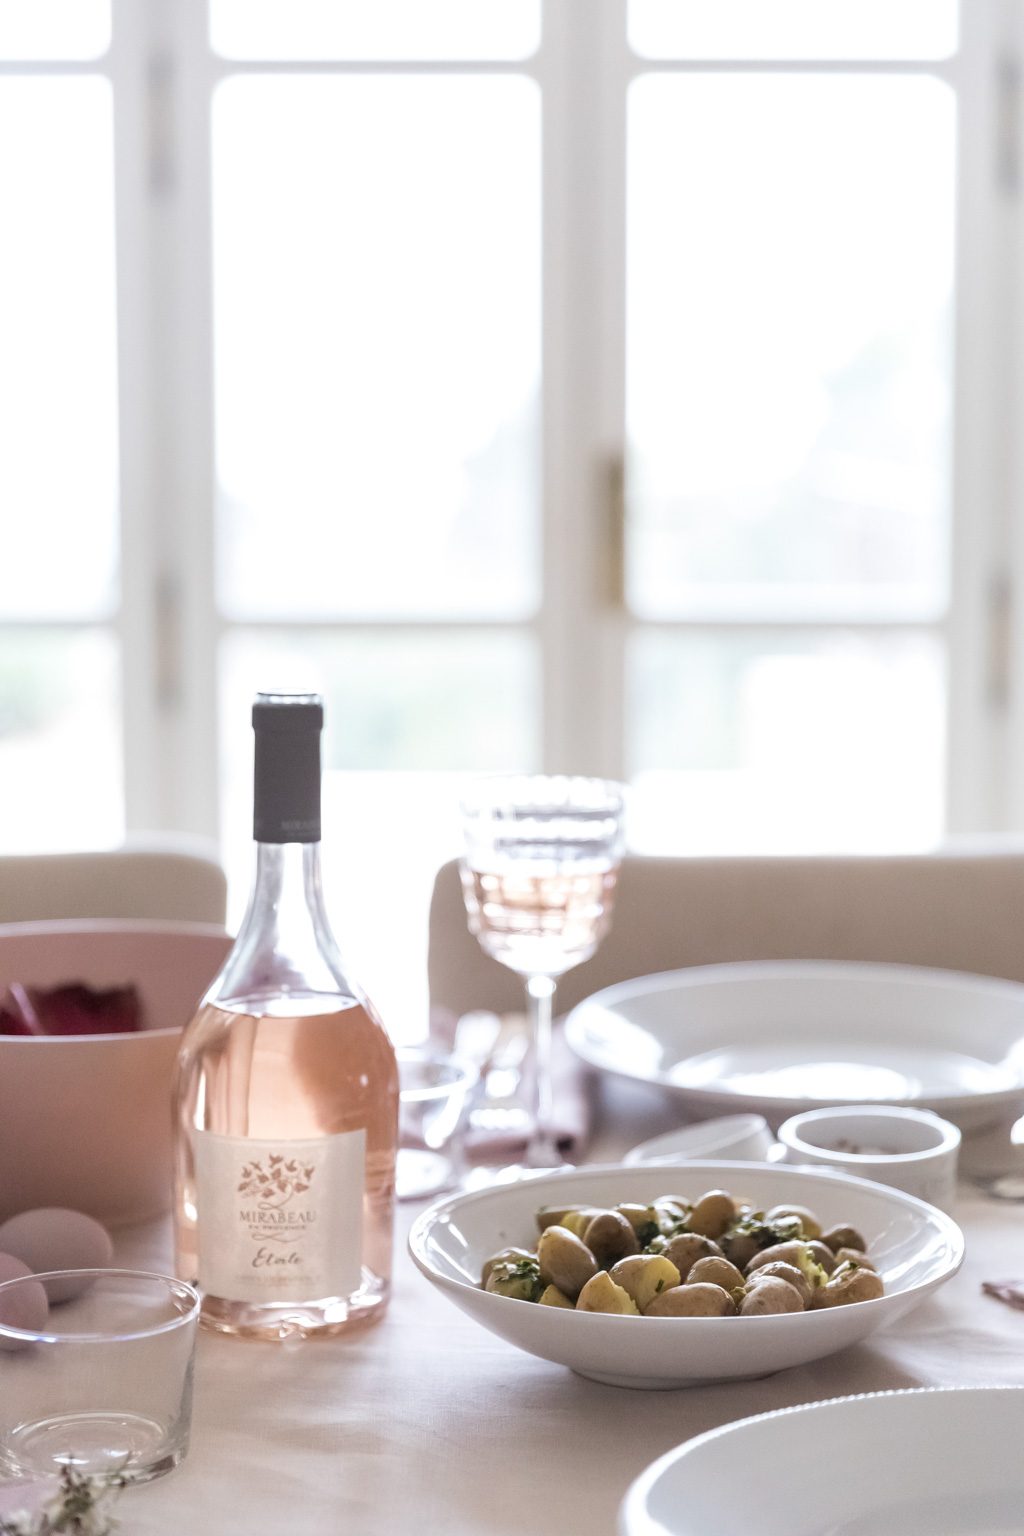
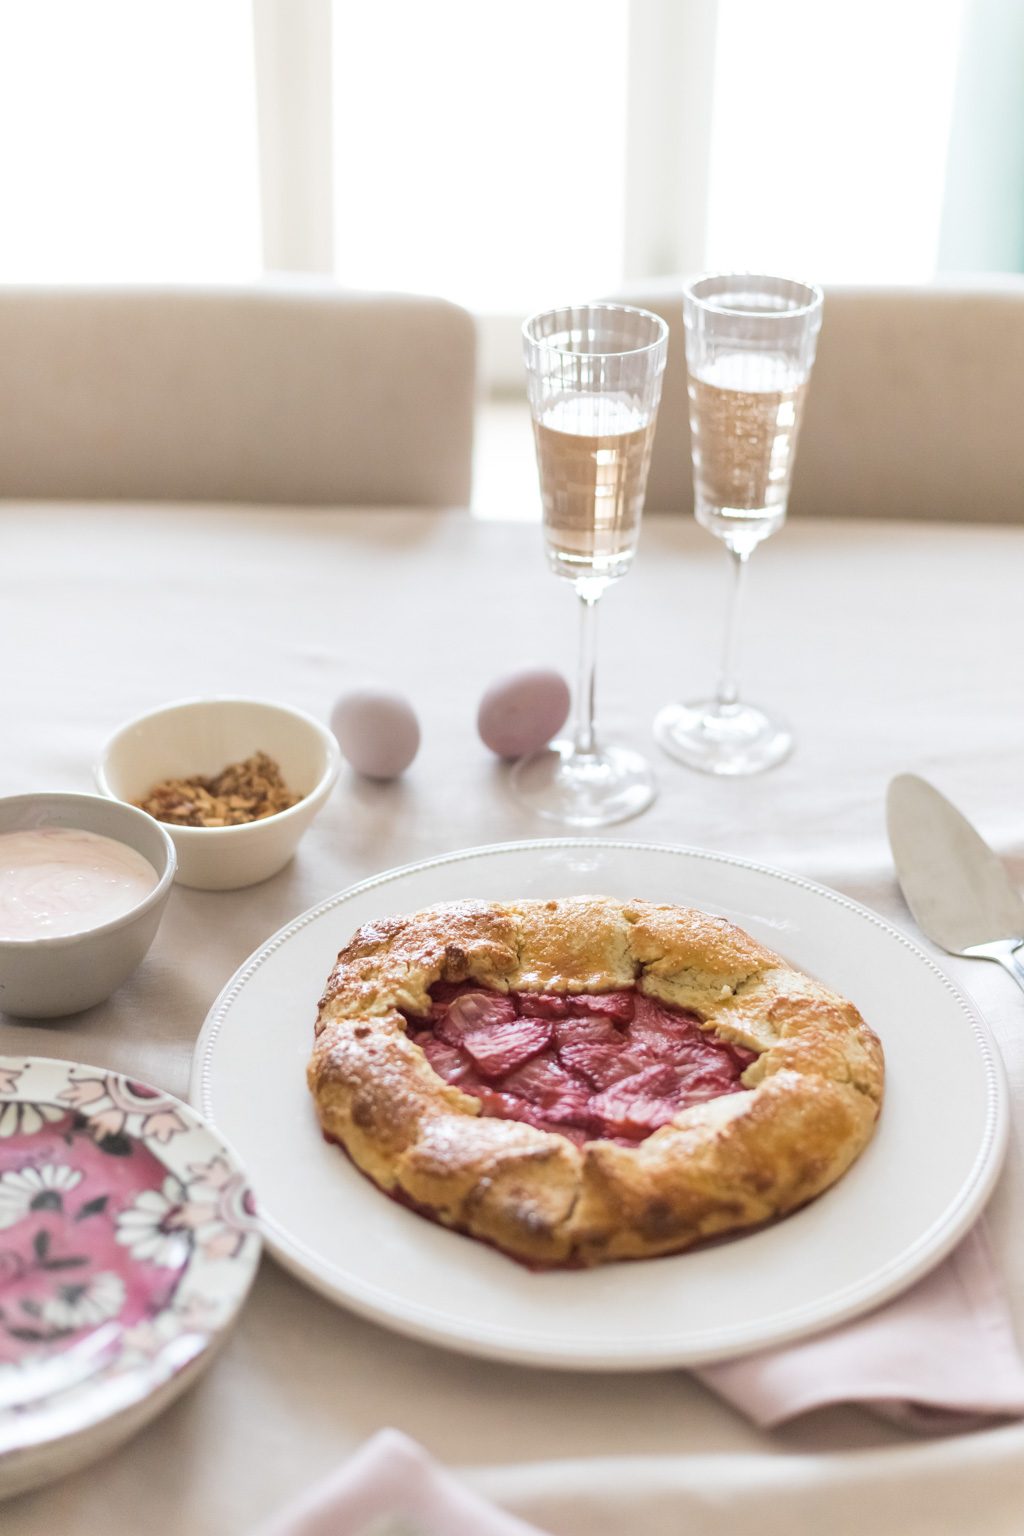
We would also like to thank Cristal d’Arques for sending us beautiful glasses to dress our Easter table. Cristal d’Arques creates gorgeous glassware inspired by the Art déco trend and French lifestyle. We used their stunning Iroko collection, which brought some extra chic to our table!
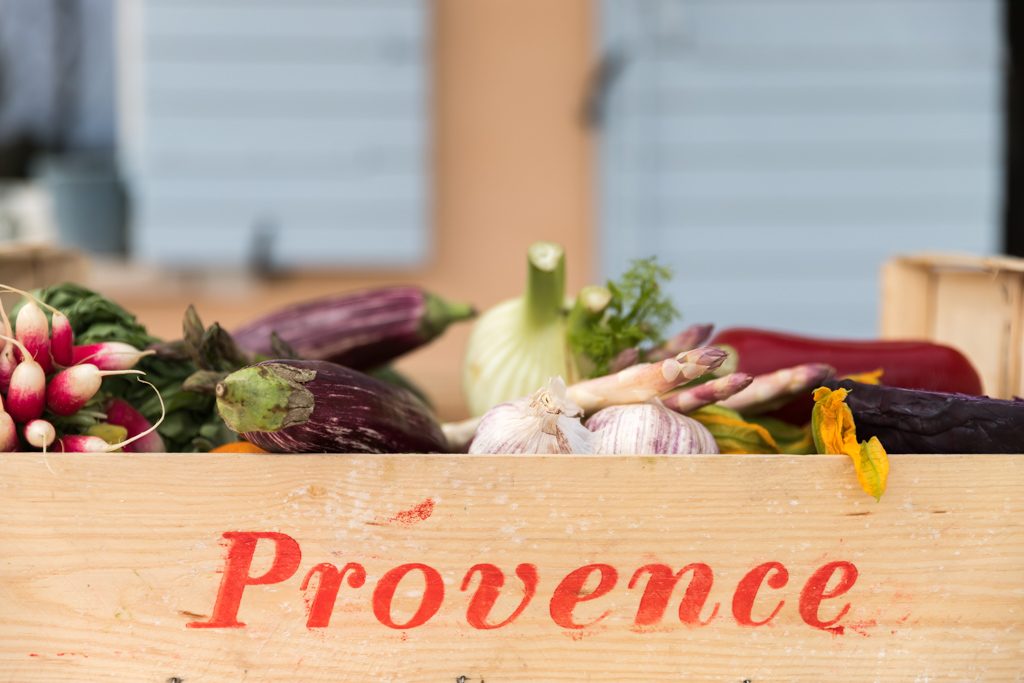
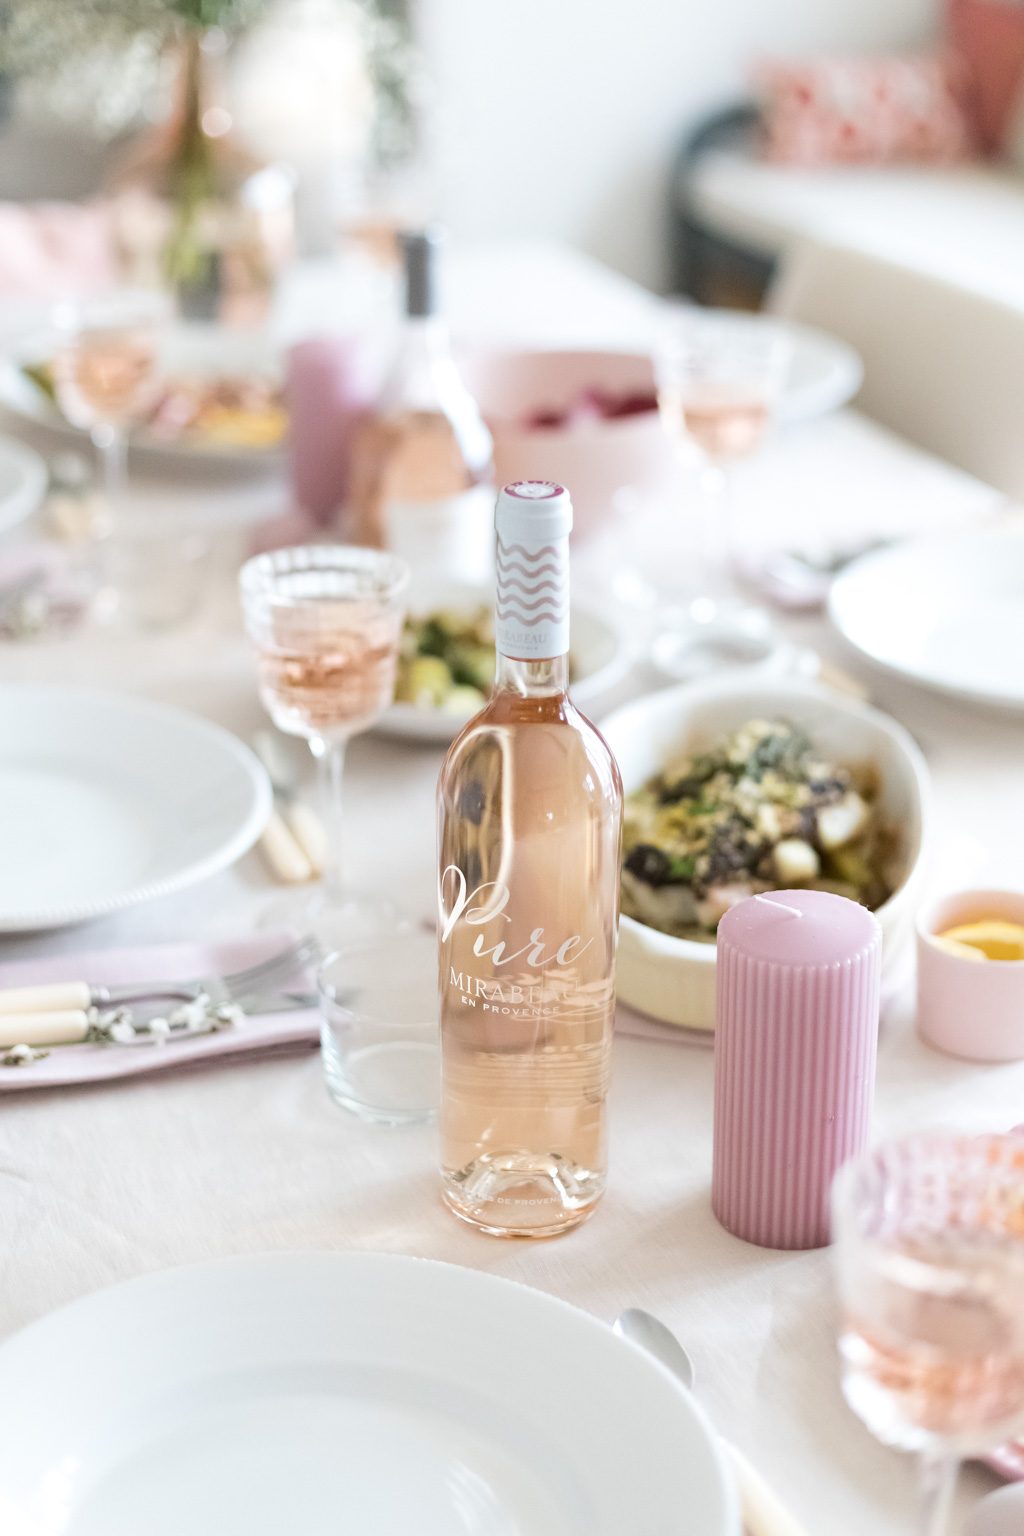
An Easter lunch inspired by the markets of Provence, by Gemma Wade
A weather worn basket stuffed with olives, cheese, sun-warmed
tomatoes, a bottle of cold wine and a baguette is the stuff of holiday dreams.
Every year hoards of us rush over to France to grab our two weeks of the French
dream – shopping for food in the fragrant bustle of a French town on market
day. Sipping ice-cold wine at a time of day we’d usually be on the school run
and eating haphazard picnics, improvising when we’ve forgotten a knife then
realising that a torn tomato squished into a fresh chunk of bread with a smear
of local goats’ cheese eaten in the sunshine is a meal that memories are made
of.
Earlier this month I spent two days working in the type of place
I’d usually rush to on holiday. I was invited to Cotignac in Provence, the home
of Mirabeau wines, to create an Easter feast, using ingredients from the town’s
Tuesday market to go alongside the wines that Mirabeau produce there. I’m such
a planner usually but the chance to think on my feet, making the most of what
was good at the market that day was a joy.
I was invited by Jeany and Stephen, the family who started
Mirabeau, who left their home in London in 2010, moving their three small
children to Provence to start making wine as well as making a home for
themselves. Their boutique and tasting room in
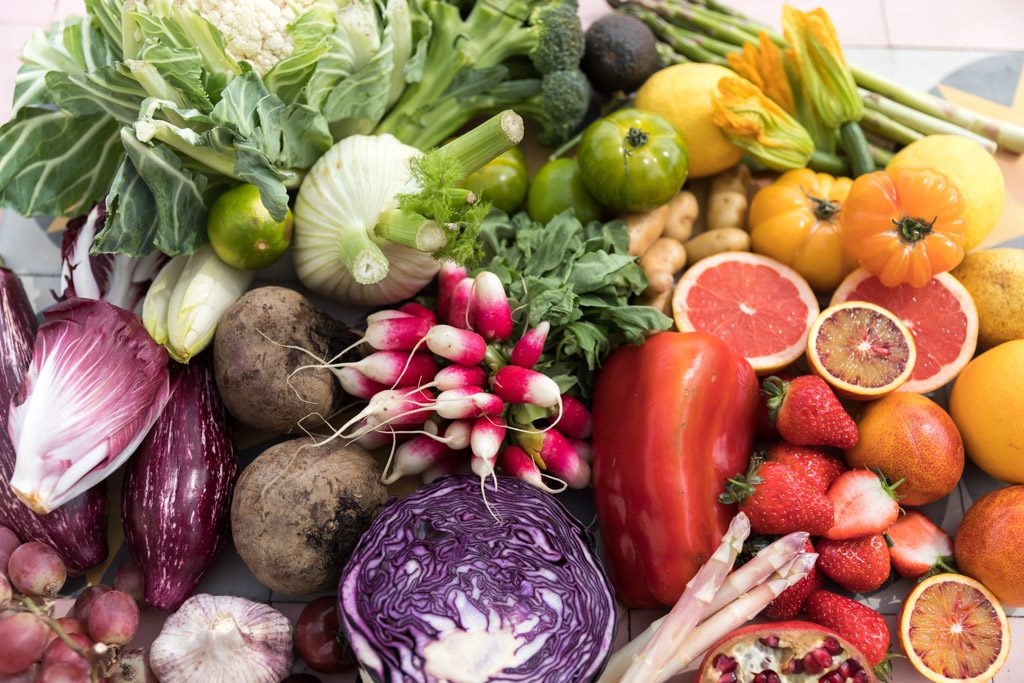
Cotignac opens out into a market that dreams are made of. The air smells of
honey, olives and lavender. I had no idea what I’d make but the visit to the
fruit and veg stall alone gave me ideas for about six dishes which I tapped
away into my phone so I wouldn’t forget. The olive stall added another layer to
the ideas and by the time we’d visited the bakery and fish monger the menu
planning was complete.
After we returned home, our baskets bursting, I spent
the next two days cooking in the family’s kitchen. On the final day, Jeany
worked her magic on the flowers and table and we served everything alongside
glasses of chilled wines from the Mirabeau range.
I wish I could take you all to visit the corner of
heaven that is Mirabeau but for now, here are the recipes from the Easter feast
so that you can make them at home. Invite your friends over, buy a few bottles
of Mirabeau and a bunch of lavender and you’ll be able to transport yourself to
Provence for one meal at least.
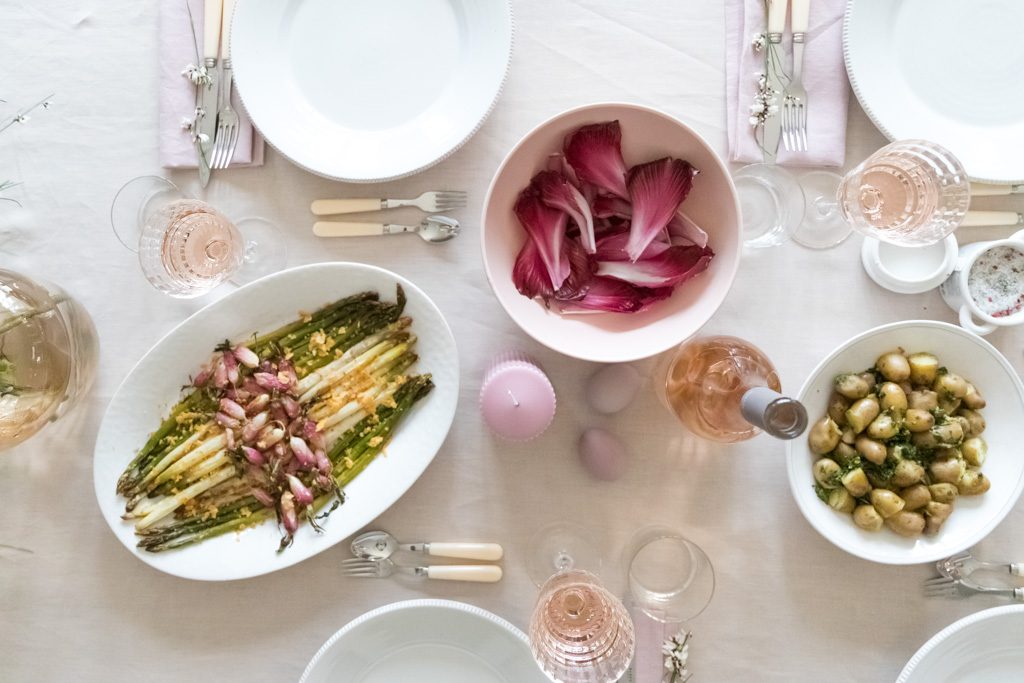
Many of the dishes from this lunch can be prepped ahead so you can enjoy a relaxing, rosé-fueled long lunch with family and friends. Serving the food like this, without the formality of courses means everyone can pick and mix what suits them. If you prefer roast chicken or lamb at Easter, you can switch them with the cod I’ve used below.
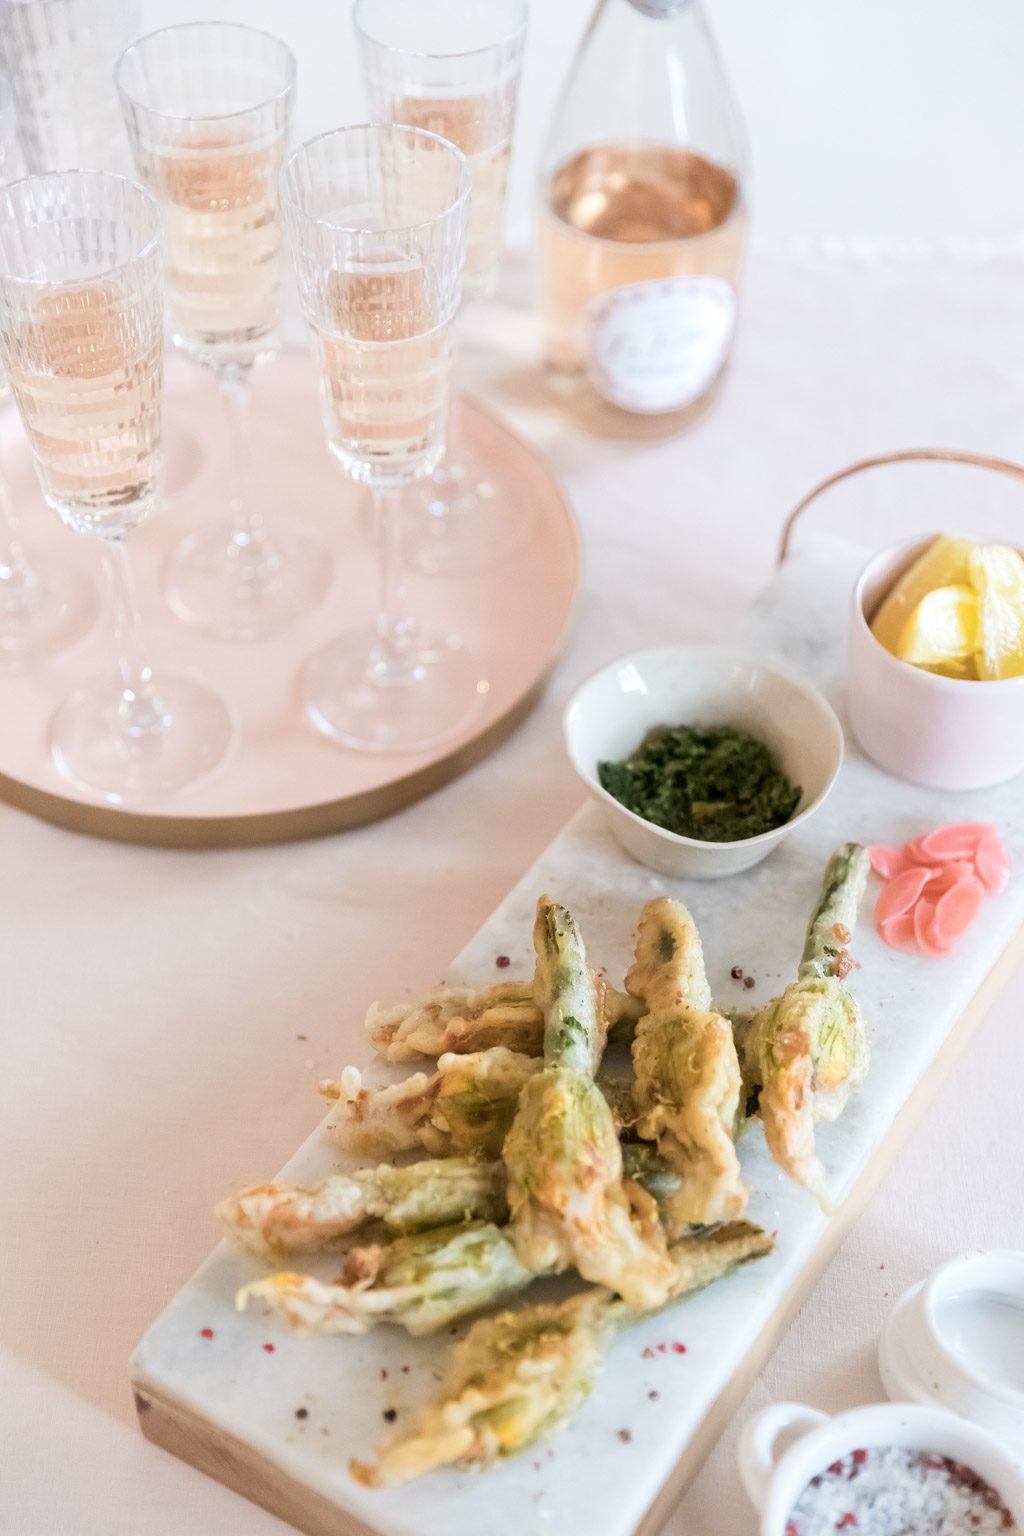
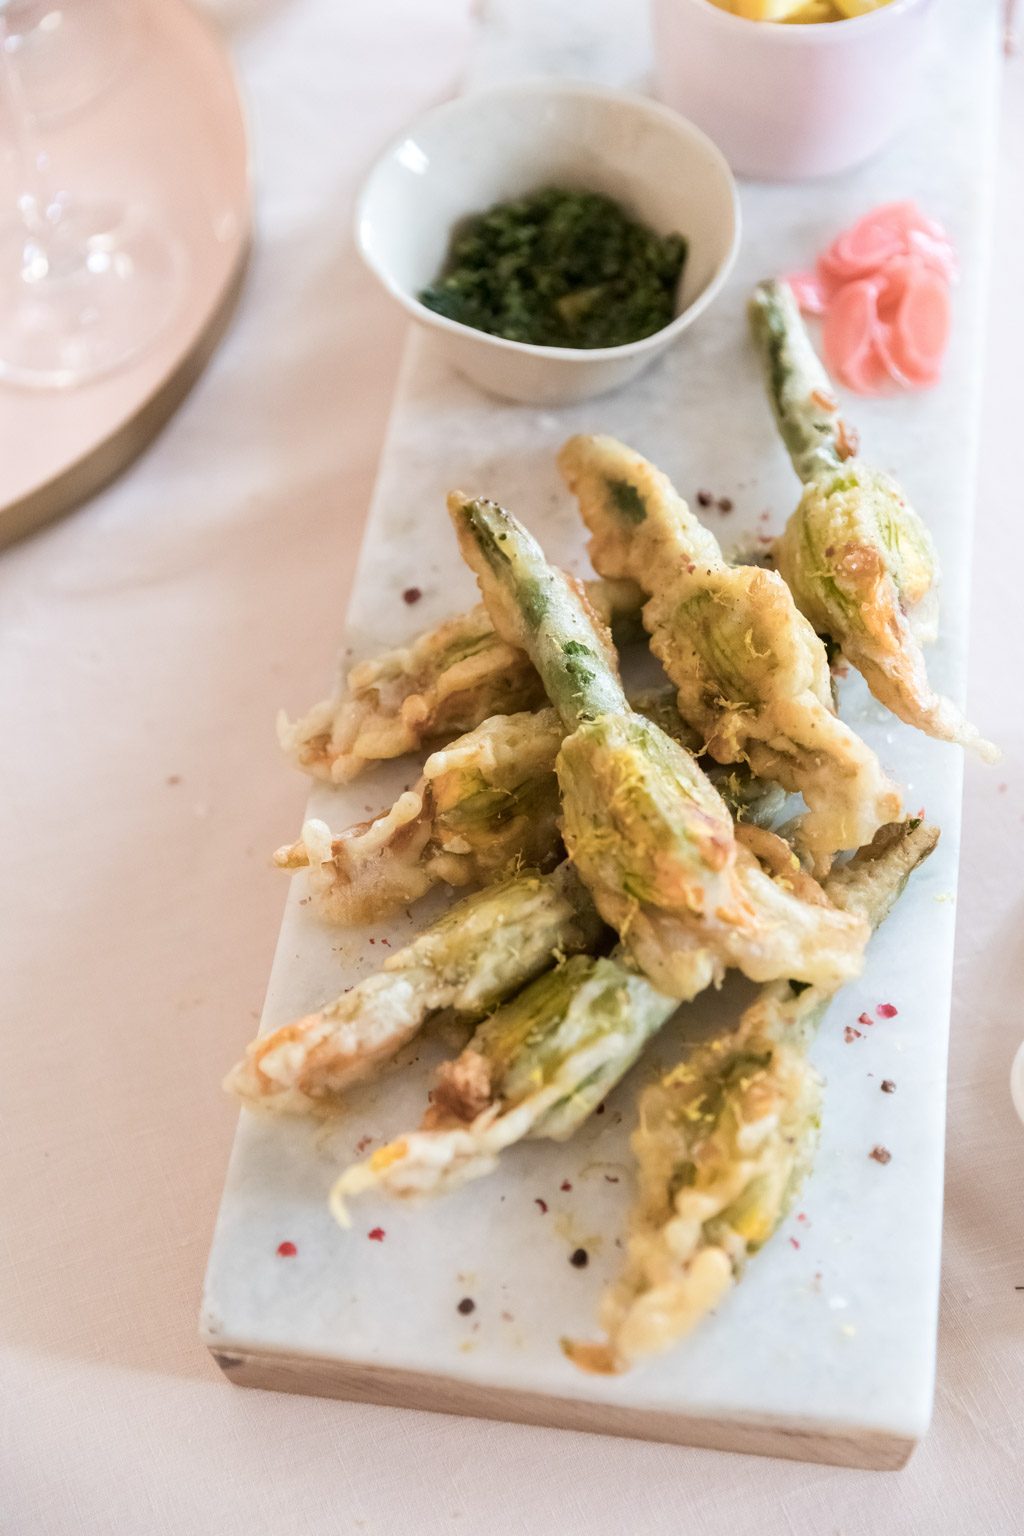
Lemon and cheese stuffed courgette flowers
One of the first things I snapped up at the market was a packet of
baby courgettes with the bright yellow, fragile flowers still attached. These
are a once a year treat for me. I first fell for them when we lived in California
and I bought them at the farmers market there. Then I started growing
courgettes, mainly so that I’d have access to the flowers! If you see these at
a farmers market, snap them up, or befriend someone who grows them.
I rarely deep fry anything but these are worth it. Rather than
properly deep frying, I just cook them in about 2 inches of oil in a large wide
pan. The key is to make sure the oil is hot, otherwise the batter will soak it
up. You can use a thermometer but I’m old school and just use a cube of bread
to check the temperature, when the bread turns golden, the oil is hot enough.
Rather than throw the oil away, let it cool, straining it through a muslin or
coffee filter and use it for cooking with.
These light, crispy treats are perfect with a glass of fizz to cut through the batter and cheese flavour, and are best when eaten straight away. What is key, is to sprinkle them really well with good salt (Maldon ideally) and a squeeze of lemon before eating them. I serve each person with lemon wedges and their own little bowl of salt when I make them because I’m bossy like that. If you panic at the thought of cooking with an audience, just remember that everyone will be so delighted at having you make these for them that they won’t notice any mess or mistakes.
The recipe is all very forgiving, I never weigh any of the ingredients when I make it now as I know how the mixture should look. Feel free to play around with the stuffing – adding different soft herbs or a different type of cheese.
Ingredients (serves 6 as a pre-dinner snack)
Rapeseed oil for frying, around 200ml
12 courgette flowers either the flowers on their own or with a baby courgette attached
60g (2 oz) Comte, Gruyere or Parmesan
140g (5oz) soft cheese such as ricotta, goats cheese or a full fat cream cheese
30g (1 oz) basil, chives or wild garlic leaves
1 lemon
Half a teaspoon freshly ground black pepper
Batter
140g (1 cup) plain (all-purpose) flour
around 250ml (just over 1 cup) very cold water
half a teaspoon fine grain sea salt
Half a teaspoon freshly ground black pepper
1 lemon
To serve
Maldon salt flakes
2 lemons
To
make
Make the stuffing by combining the finely grated hard cheese with the soft cheese. Add the finely chopped herbs, pepper and the zest of a lemon. I usually mash mine together with a fork. This will be easier if your cheese is room temperature.
Make the batter by whisking together your flour, salt, pepper, lemon zest and the juice of the lemon. Then slowly add the cold water, you may not need all of it, whisking until you have the texture of thick cream. The odd lump is fine and, weirdly, will help you get a nice crunchy batter.
Start warming the oil over a medium high heat. Use a wide, high sided pan. A high sided frying pan is good, a less wide saucepan will mean you can only cook a few in each batch as otherwise they’ll stick together.
While your oil warms, start to stuff your flowers. You can be cheffy and tidy and use a piping bag but I’m never organised enough to use that. I just gently peel one of the flower petals, check for any tiny insects and if I find them, gently remove them. Then I use a teaspoon to squish around a tablespoon of the cheese mixture inside each flower. Then I squish the petals back together so that the cheese is enclosed. A little bit of seepage is fine. The cheese should help the petals stick together if they tear. The first one will feel tricky but you’ll quickly get into a routine. You can stuff the flowers and leave them in the fridge at this stage for a few hours.
Once you have stuffed all your flowers you can test that your oil is hot. I do this by dropping a cube of bread (or a dollop of leftover batter) in, if it sizzles and starts to turn brown pretty quickly you are ready to fry. If not, leave the bread in and watch until it goes brown.
Start cooking. Set up a production line with a plate of paper towel next to to your pan of oil, a pair of tongs, a slotted spoon, your bowl of batter and your stuffed flowers. Then, one by one, dip each flower in the batter until well coated and quickly, carefully place into the oil. I reckon on cooking 4-5 at a time in my pan. Too many and they’ll bring the temperature of the oil down and be soggy, or they’ll stick together.
Cook them on one side without moving them until they turn golden and crisp (around 3 minutes), then use your tongs and spoon to gently turn them over and cook them for another couple of minutes on the other side.
Set them onto the paper towel to remove excess oil while you cook the next batch.
Serve. Make sure your friends are ready with their wine poured and their pile of lemon wedges so that they can eat them while they are fresh and hot – with a squeeze of lemon and salt.
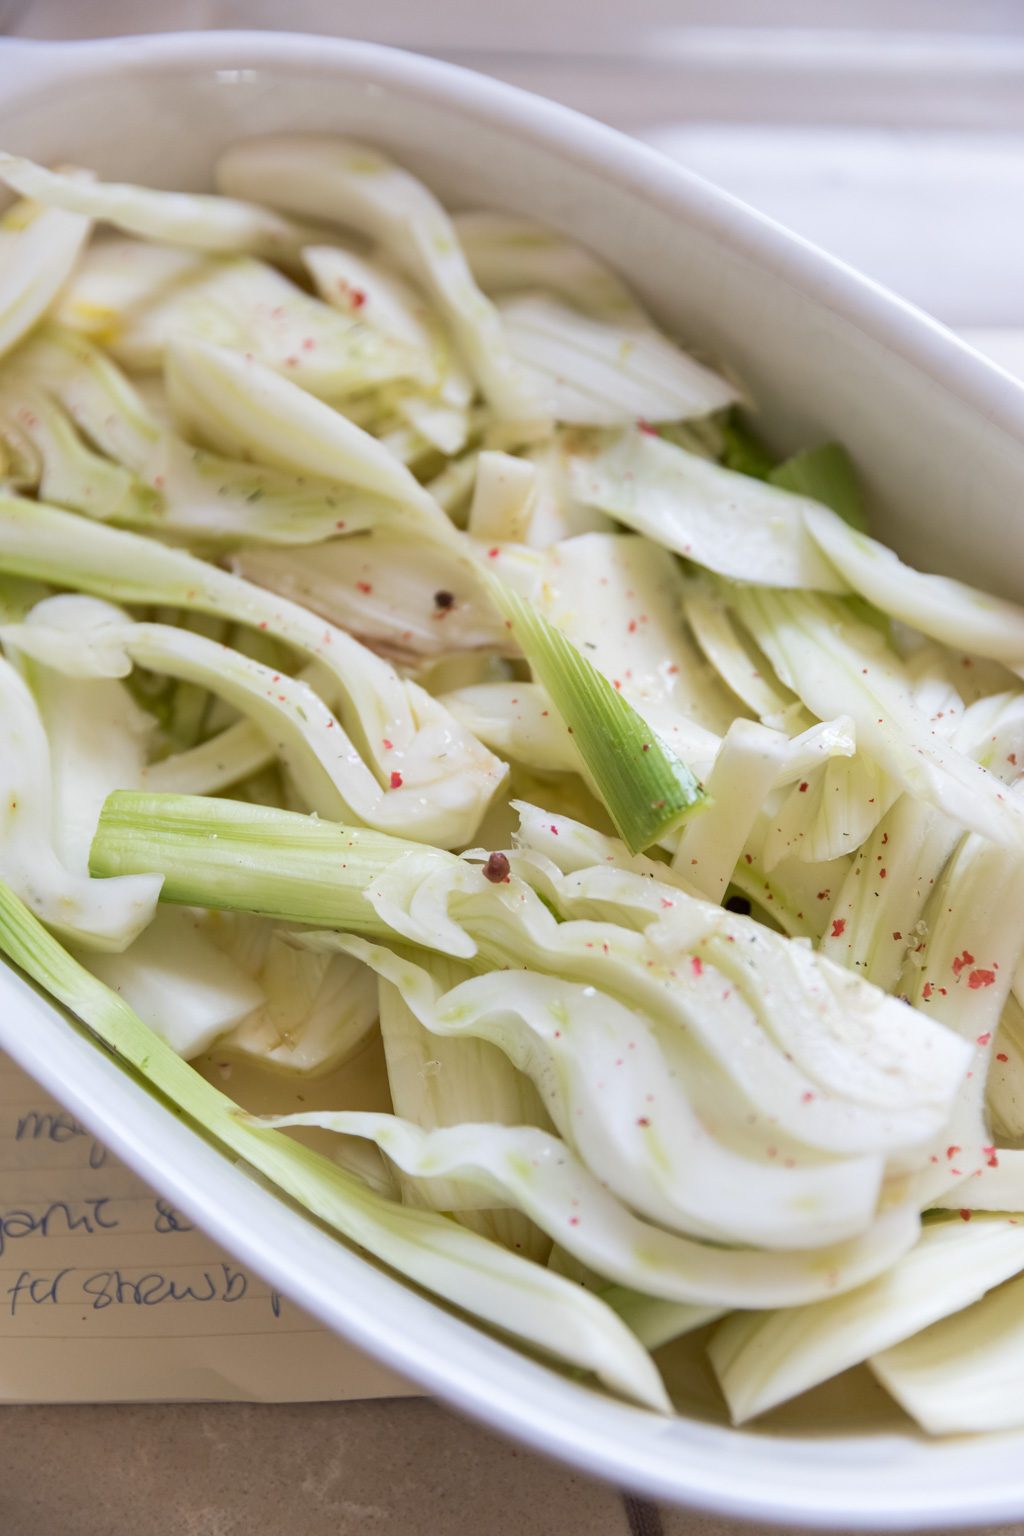
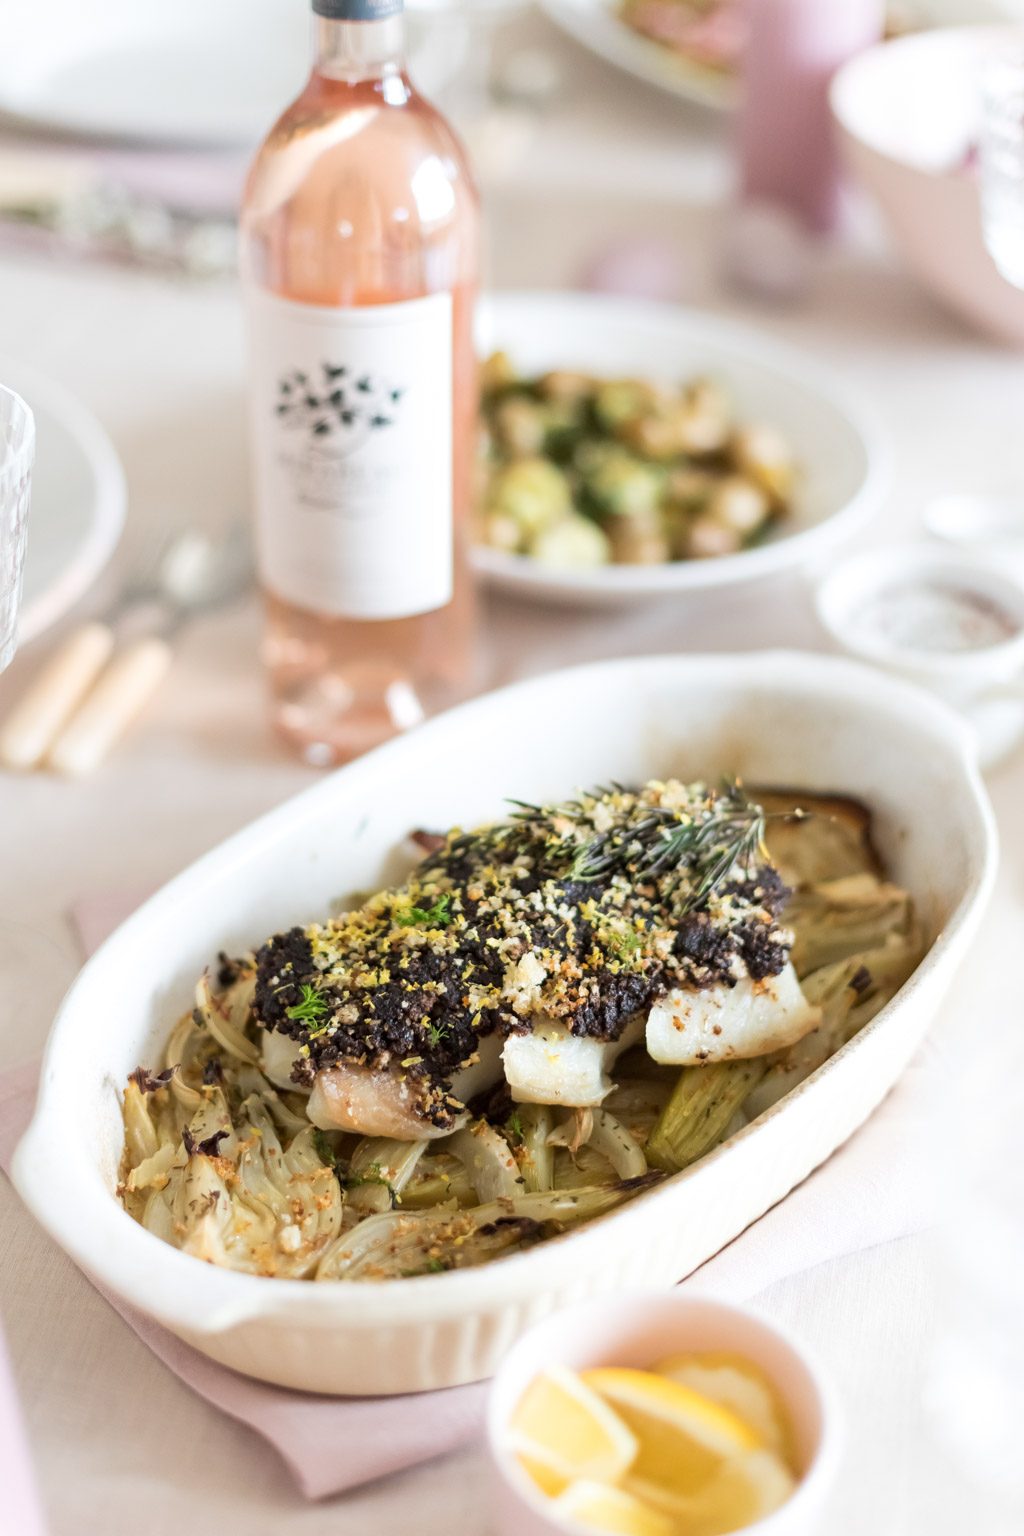
Cod with tapenade crust and rosé braised fennel
The lines around the eyes of the man selling olives at the market
had clearly been earned by the days he spent smiling at his customers in the
sun as he chatted enthusingly about the olives and tapenades on his stall. His
passion for making such delicious tapenade made the job of cooking dinner so
much easier as so much of the flavour work had been done.
Tapenade is a paste made with anchovies, olives and capers which
you can pick up in a jar. However, because it is easy to make and brings so
much flavour to this dish, you can make your own using the recipe below.
Buy cod in a single thick piece if you can and it will stay more
tender. If you prefer to use chicken, stuff the tapenade under the skin and
scatter the breadcrumbs under the chicken to soak up the juices before
roasting. Or spread the tapenade and crumbs over the surface of a leg of lamb
before roasting.
Prep ahead – You can make the toasted crumbs and tapenade a couple
of days ahead. The fennel can be braised the day before.
Ingredients (serves 6)
Braised fennel
30g (1 oz) salted butter
4 cloves garlic
1 tablespoon fennel seeds
2 large bulbs fennel
1 glass (200ml) Mirabeau rosé wine
Half a stock cube – chicken or vegetable, I use Kallo brand
Sea salt and freshly ground black pepper
Roast cod with tapenade
900g (2lb) skinless boneless cod fillet, ideally in 1 piece
2 tablespoons fresh breadcrumbs, made by blitzing a slice of bread in the food processor
1 teaspoon olive oil
a stem of rosemary
2 lemons
4 tablespoons black olive tapenade – I like the Belazu black olive version in the UK or the Trader Joe’s version in the US. Or make your own – see the recipe below.
To make
To make the braised fennel:
Heat the oven to 200°C (180°C fan) 400°F (350°F convection).
Put the
butter into a small frying pan over a medium heat while you peel and slice the
garlic. Add the garlic slices to the pan along with the fennel seeds and cook
gently while you prep the fennel.
Cut the very
ends off the fennel stalks, keeping any feathery fronds to use as a herb at the
end of cooking. Chop the fennel bulb in half from root to stalk then cut the
root ends off. Then cut each half into slices around 5mm (¼ inch) thick from
root to tip. Lay the fennel in deep sided ceramic or glass baking dish, around
A4 size.
When the
garlic is gently golden and soft, add the wine to the pan and allow to bubble
for a minute before adding the stock cube and 100ml (half a cup) boiling water.
Use a spatula to squish the cube into the liquid until combined then take off
the heat and pour it over the fennel slices. Tightly cover the dish of fennel
with foil then bake for 45 minutes until the fennel is tender.
When the
fennel is ready, either season with lemon zest and juice and a final splash of
wine and serve immediately, or use as a base for the cod. Once cooked, the
fennel can sit in the fridge for 4 days and can be reheated in the oven.
To make the cod:
Pre-heat the oven to 200°C (180°C fan) 400°F (350°F convection).
Put the
breadcrumbs into a small frying pan with a teaspoon of oil and a whole stem of
rosemary, cook on a medium heat for around 6 minutes, shaking occasionally
until they turn a dark golden brown and rustle when you shake the pan. These
can be done the day before and sit out of the fridge.
Season both
sides of the cod with salt and pepper then mix the tapenade and two thirds of
the breadcrumbs together and spread over the top of the fish. It is easier but
slightly messier to do this with your fingers.
Place the cod
on top of the cooked fennel or cook it on its own on a slightly oiled metal
baking tray. Cook for 10-15 minutes depending on the size of your piece of
fish. A single piece will take longer. Check after 10 minutes and once you see
the large flakes starting to separate, take a look at the center, it should no
longer be cold and should gently flake when you push it, if it doesn’t flake,
put it back in the oven for 2 minutes before checking again. Remember the fish
will continue to cook for a few minutes so it is worth playing a waiting game
and keep checking every 2 minutes at this stage.
When the fish
is ready, take it from the oven and zest a lemon all over the tapenade before
sprinkling the remaining toasted breadcrumbs over the tapenade for a final
contrasting crunch.
Serve the
fish and fennel with wedges of lemon. A blog of good homemade or shop bought
mayonnaise would be pretty lovely alongside too.
Tapenade
Make the salty, pungent tapenade for the recipe above and use any leftovers as a topping for crostini, stirred through pasta or boiled potatoes or spread on a sandwich. I love it dotted on tomatoes too. The saltiness makes it the perfect thing to dip into alongside a glass of rosé before dinner.
Ingredients (makes around a ramekin full)
200g (7 oz) stone-in black olives, ideally Kalamata olives
3 tablespoons capers
2 anchovies
1 clove of garlic
a lemon
4 tablespoons extra-virgin olive oil
To make:
Use the side of a knife to squish the olives then rip them to remove the stones. Discard the stones.
Put all the olives, capers, anchovies and garlic in a food processor andpulse until you have a fine mush. Alternatively, crush in a mortar and pestle or chop finely with a knife.
Add the olive oil and the juice and zest of half a lemon and mix or blend again. Taste and add more lemon juice and zest as needed. A jar will last for a week in the fridge.
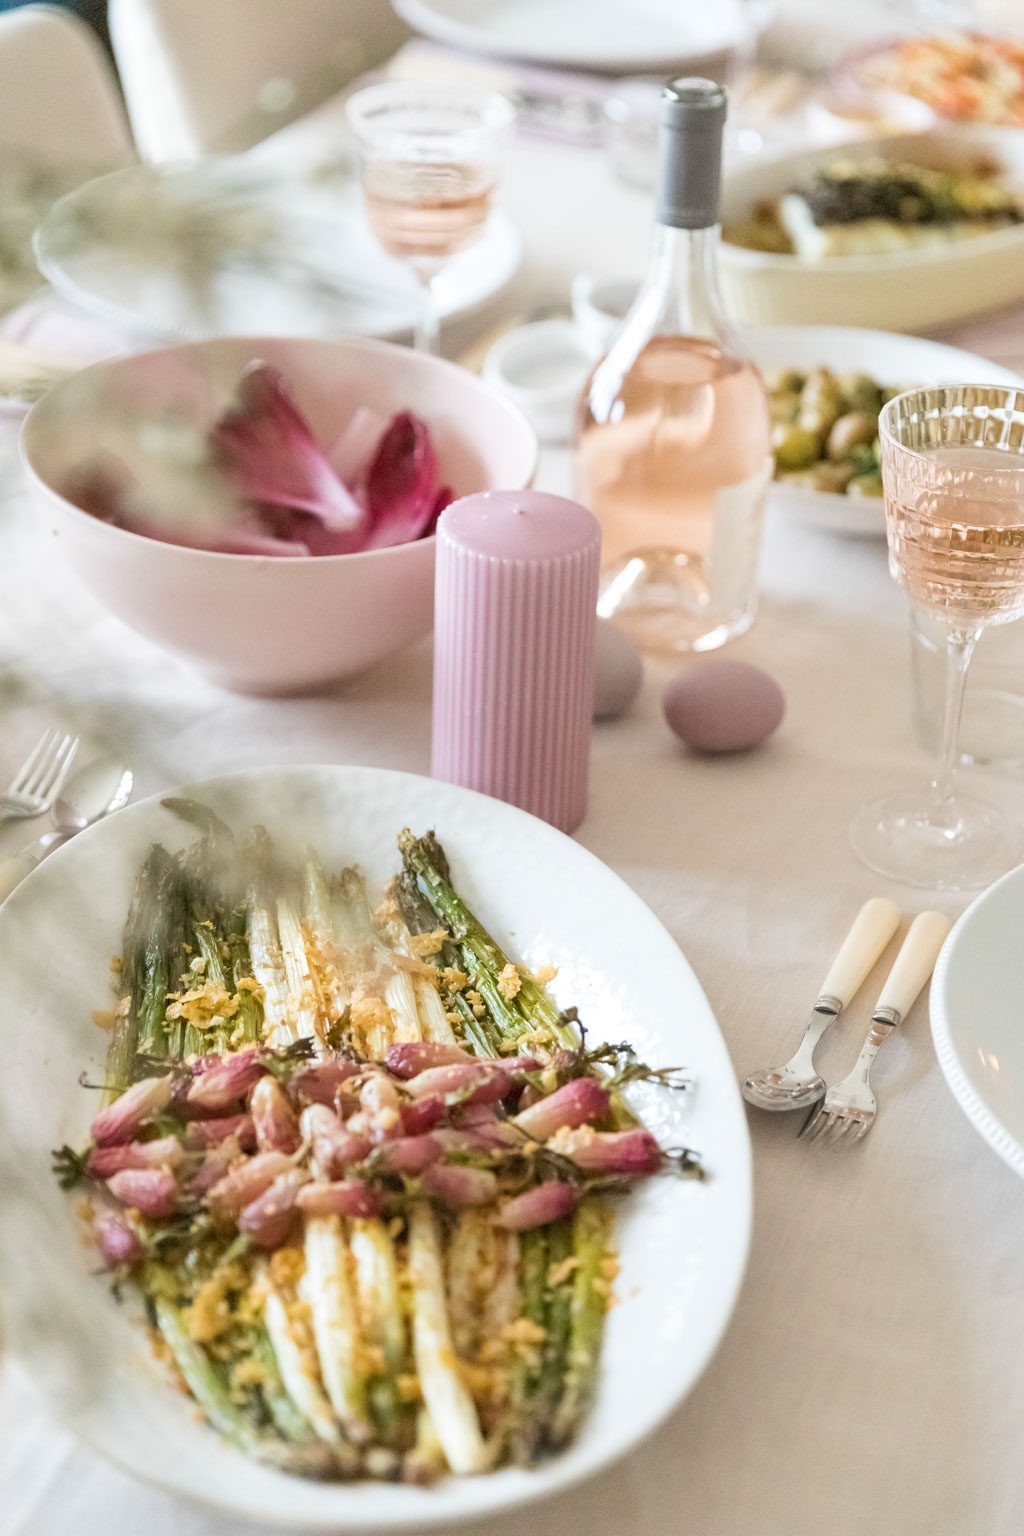
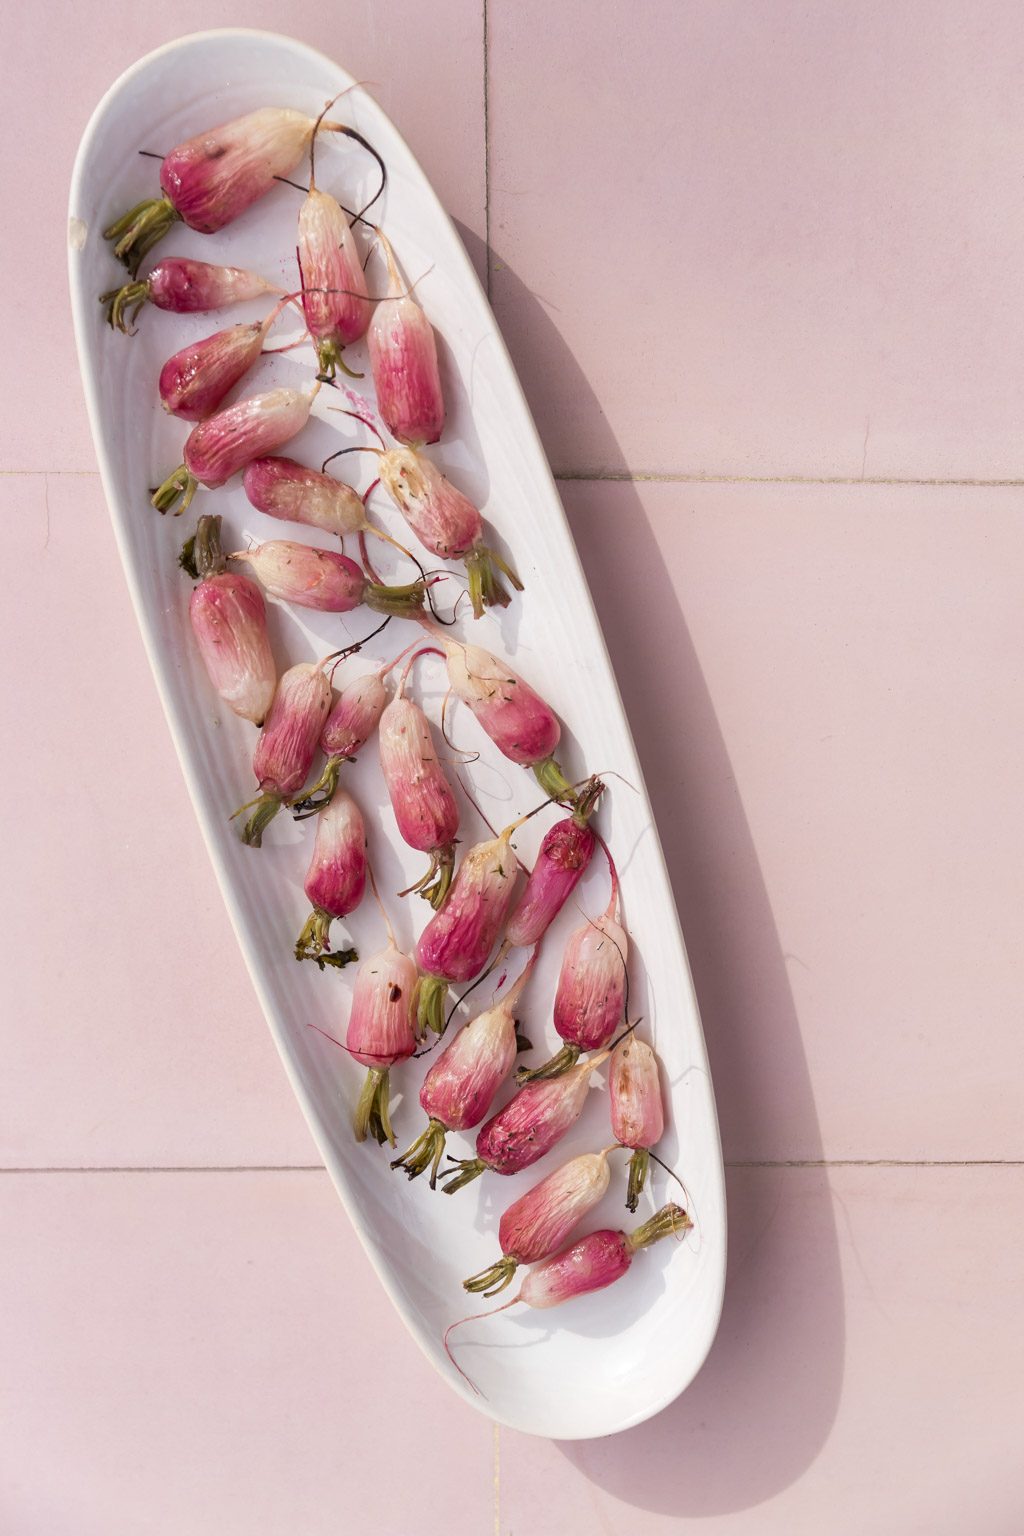
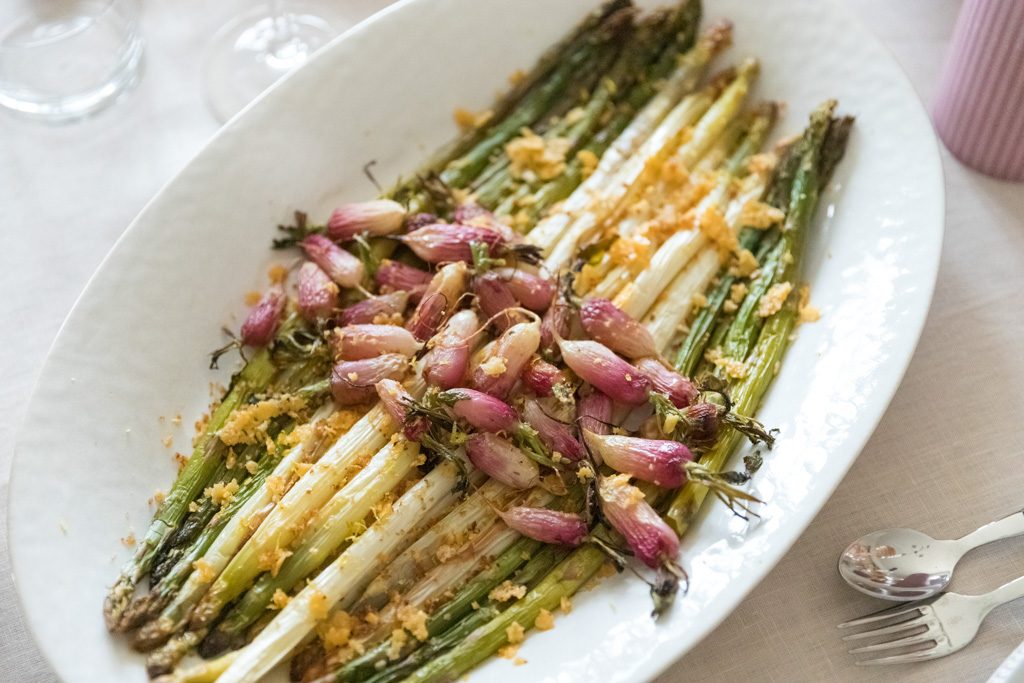
Roast radish and asparagus with lemon and cheese crumbs
The market in Cotignac, home of Mirabeau, was bursting with spears
of white asparagus. Each bunch with ombre colours ranging from lilac to
Mirabeau pink. It is rare to find white asparagus in the UK or US but our locally
grown green asparagus is equally delicious and at its best and more affordably
plentiful at this time of year.
Roasting asparagus is a safer bet than steaming or boiling if you’re
feeding a crowd. A couple of minutes too long in a pan of water and your bundle
of asparagus can become soggy whereas in the oven it takes a little longer and
is therefore more forgiving if timings shift.
Asparagus loves lemon, salt and butter. I made a cheese crisp and
crumbed it over the asparagus for a salty crunch and because of the big
flavours elsewhere I didn’t add much else. Any leftovers can be chopped into as
salad the next day or blended into a soup.
I’ve never been a huge fan of raw radishes but roasting them has been a revelation. Their flavour is mellowed by roasting and they are a wonderful side dish, simply cooked with salt and a little oil. We had some leftover from the shoot and found them perfect to be nibbled with drinks too.
Ingredients – serves 6 as a starter or side dish
2 bundles (around 800g or 28 oz) asparagus
400g (14 oz) radishes – try and get the long breakfast radishes if you can
2 tablespoons olive or rapeseed oil
60g (2 oz) Gruyere or Comte cheese or Parmesan
1 lemon
Sea salt and freshly ground black pepper
To make
Pre-heat the oven to 200°C (180°C fan) 400°F (350°F convection).
Wash the
asparagus and radish, both can get quite sandy so I always soak them in a large
bowl of water, giving them a bit of a shake to dislodge any stubborn grit.
Prep the
asparagus by bending each stem and allowing it to snap where it naturally
breaks. Discard the tough ends or freeze them to throw into a soup. Lay the
asparagus stems on a baking tray and sprinkle a tablespoon of oil over, using
your hands to rub the oil into the spears before scattering them with a
teaspoon of sea salt flakes or half a teaspoon of fine grain sea salt. Set
aside.
Prep the
radish by cutting the green leaves off, leaving around an inch of green and a
leaf or two. Any discarded leaves can be eaten raw as a peppery addition to a
salad. Put the radishes in a small oven proof dish, scatter a teaspoon of oil
and a generous pinch of salt over them, shake and pop in the oven for 20-30
minutes until they are tender and slightly shriveled.
Make the
cheese crisp by finely grating the cheese onto a tray, ideally lined with a
silicone sheet to make cleaning up easier. Pop in the oven for 8-10 minutes
until golden brown and melted. Pull out of the oven to cool and it will crisp
up. User a fish slice to lift the cooled cheese off the tray and then break
into a bowl and set aside. This can be
done a day ahead if need be.
When the cheese
crisp is cooked and the radish is nearly ready, put the tray of asparagus into
the oven and cook for 12-15 minutes. To test if it is cooked, give one of the
thicker stems a squeeze. If it gives, it is ready.
Finish the
dish by laying the stems on a platter, lay the radishes alongside or on top.
Scatter them with lemon zest, a little more salt, lemon juice and the cheese crumbs.
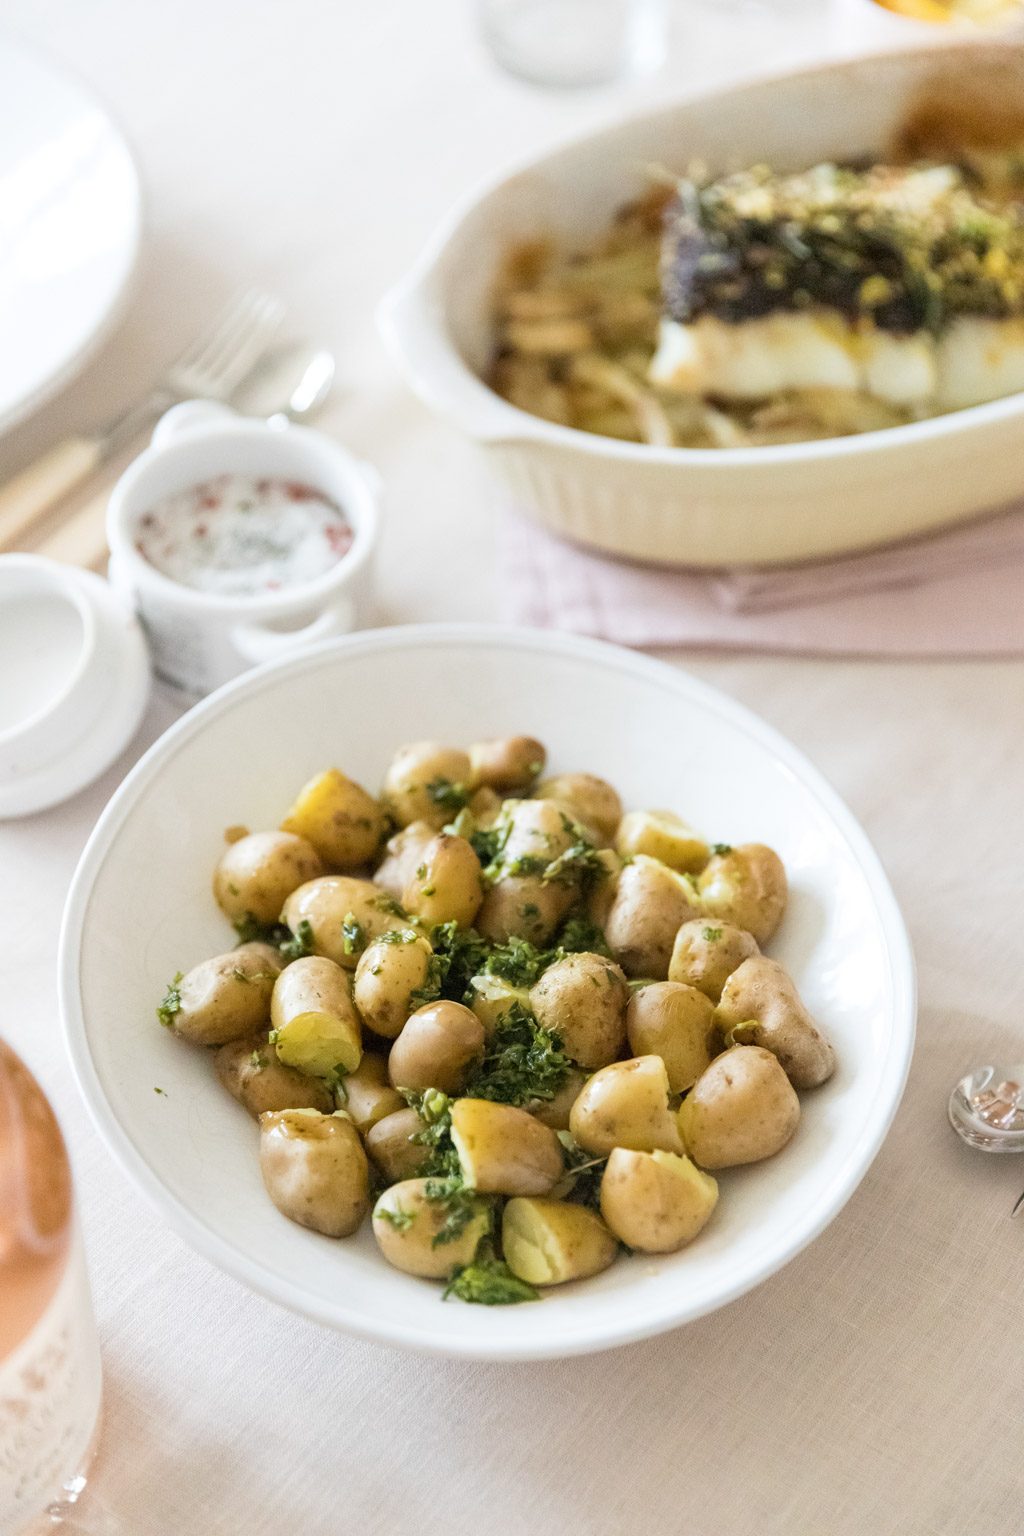
New potatoes with salsa verde butter
This salsa verde butter came about by accident when I had leftover
salsa verde from another recipe and mushed some with butter to sneak onto a
chunk of crusty bread. Now I’m obsessed with it. You can make a log of it, wrap
it in parchment and freeze it then just cut a chunk off when you need it for
cooking. Use it to dress vegetables, stuff under the skin of a roast chicken or
to spread thickly on bread. It will last for a week in the fridge.
We were lucky enough to find wild garlic on the market, if you
don’t have any, you can use chives instead.
Leftover potatoes, even once dressed with the salsa verde butter are delicious roasted. In fact I’d make extra just so you can have them roasted a couple of days later.
Ingredients (serves 6)
1kg (2 ¼ lb) new or baby potatoes
1 teaspoon fine grain sea salt
Salsa verde butter
30g (1oz) flat leaf parsley, leaves and stalks
30g (1oz) chives or wild garlic
1 heaped tablespoon capers
¼ teaspoon fine grain sea salt
1 heaped teaspoon Dijon mustard
½ teaspoon honey
1-2 teaspoons white wine vinegar
To make
Cut any large potatoes in half but otherwise leave them whole. Put the potatoes into a large pan of boiling water with a teaspoon of sea salt and simmer for around 20 minutes until tender.
Put the butter in a bowl large enough to fit on top of the pan of potatoes and leave it there to melt slightly.
Make the salsa verde by putting all the ingredients in a food processor or mortar and pestle and crush to an almost smooth paste. Taste and add more honey, vinegar or salt as needed.
Add the softened butter to the salsa verde and mix before scraping onto a piece of parchment, squishing into a log, wrapping and scrunching the ends closed like a Christmas cracker.
When the potatoes are tender, drain, return to the pan and add a couple of tablespoons of the salsa verde butter. Toss until it is melted, coating the potatoes then serve.
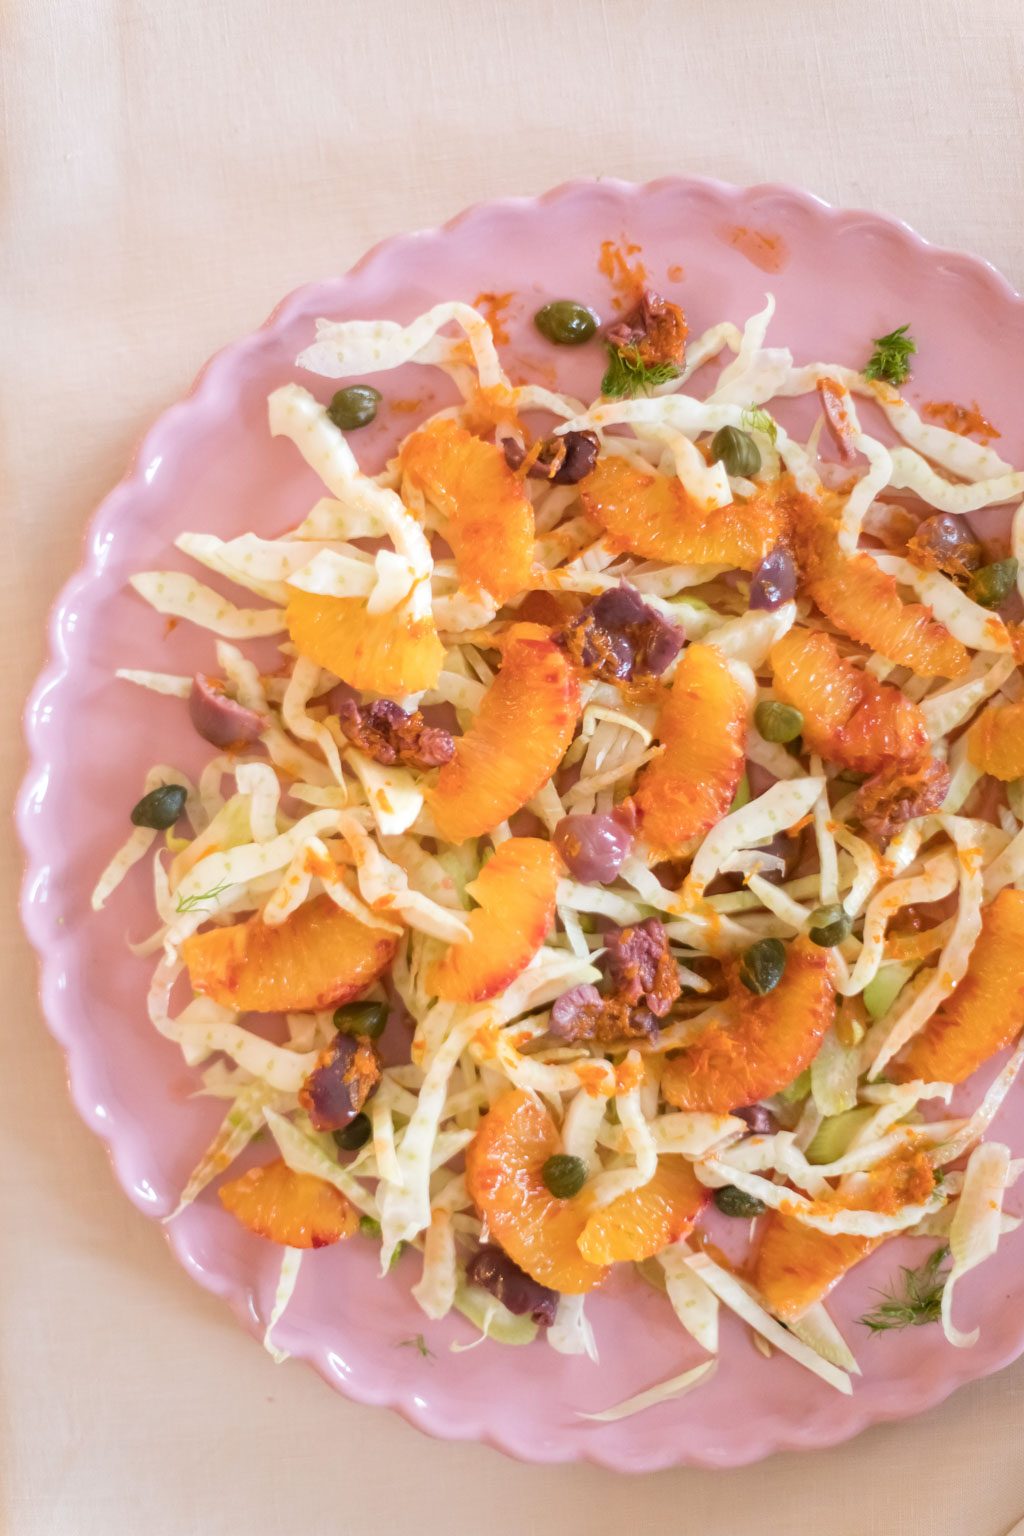
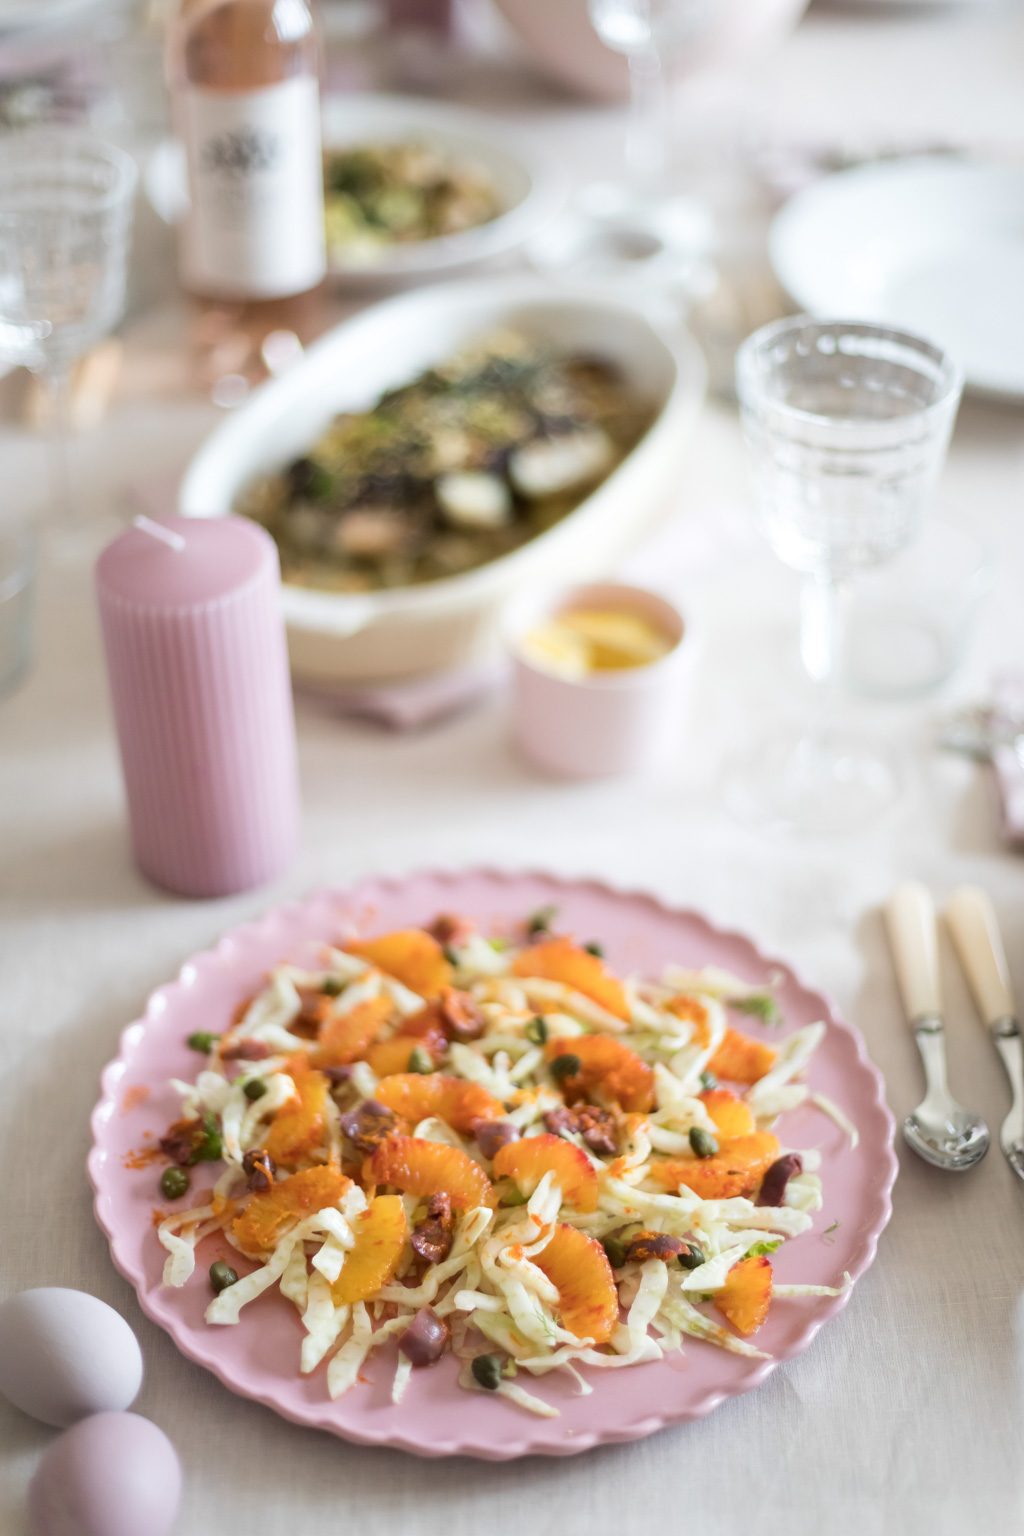
Orange, fennel, olive and caper salad
This easy salad brings zing and brightness to the table. The salt
of the olives and capers balances the sweetness of the orange. This should
really be made no earlier than 30 minutes before eating. If you want to get
ahead, you can segment the orange earlier in the day and leave it sitting in
the lemon juice.
Ingredients (serves 6 as
a side)
2 bulbs of fennel
1 blood or regular orange
1 lemon
2 tablespoons capers
Around 10 stone-in Kalamata olives
1 tablespoon good olive oil
10g chives
Sea salt and freshly ground black pepper
To make
Zest the
orange into a bowl then use a serrated knife to cut both ends off an orange
then sit the orange on one of the flat ends and cut down, following the curve
of the orange with the knife to remove the skin and any white membrane. Once
peeled, hold the orange in your hand over the bowl of zest and use the knife to
carefully cut in between the lines that separate the segment. This will mean
you leave the membranes attached at the core and the segments will drop out.
Drop the segments into the bowl then squeeze any juice from the core into the
bowl.
Cut the
fennel in half from root to tip. Chopping off any tough bits at the end of the
stalks then cut each half into very thin slices cutting across in parallel to
the root. Discard the root and put the slices in the bowl with the orange.
Zest and
juice half of the lemon into the fennel and orange then add the capers and
olive oil and toss together. Taste and add salt and more lemon as needed.
Use the side of a knife to squish the
olives then rip them to remove the stones. Discard the stones and rip each
olive into roughly 4 pieces.
To serve, lay
the dressed orange and fennel on a platter, scoop the capers and juice over
then scatter the olives on top. Finely slice the chives and scatter over the
finished platter. Taste and add freshly ground black pepper, salt and lemon as
needed.
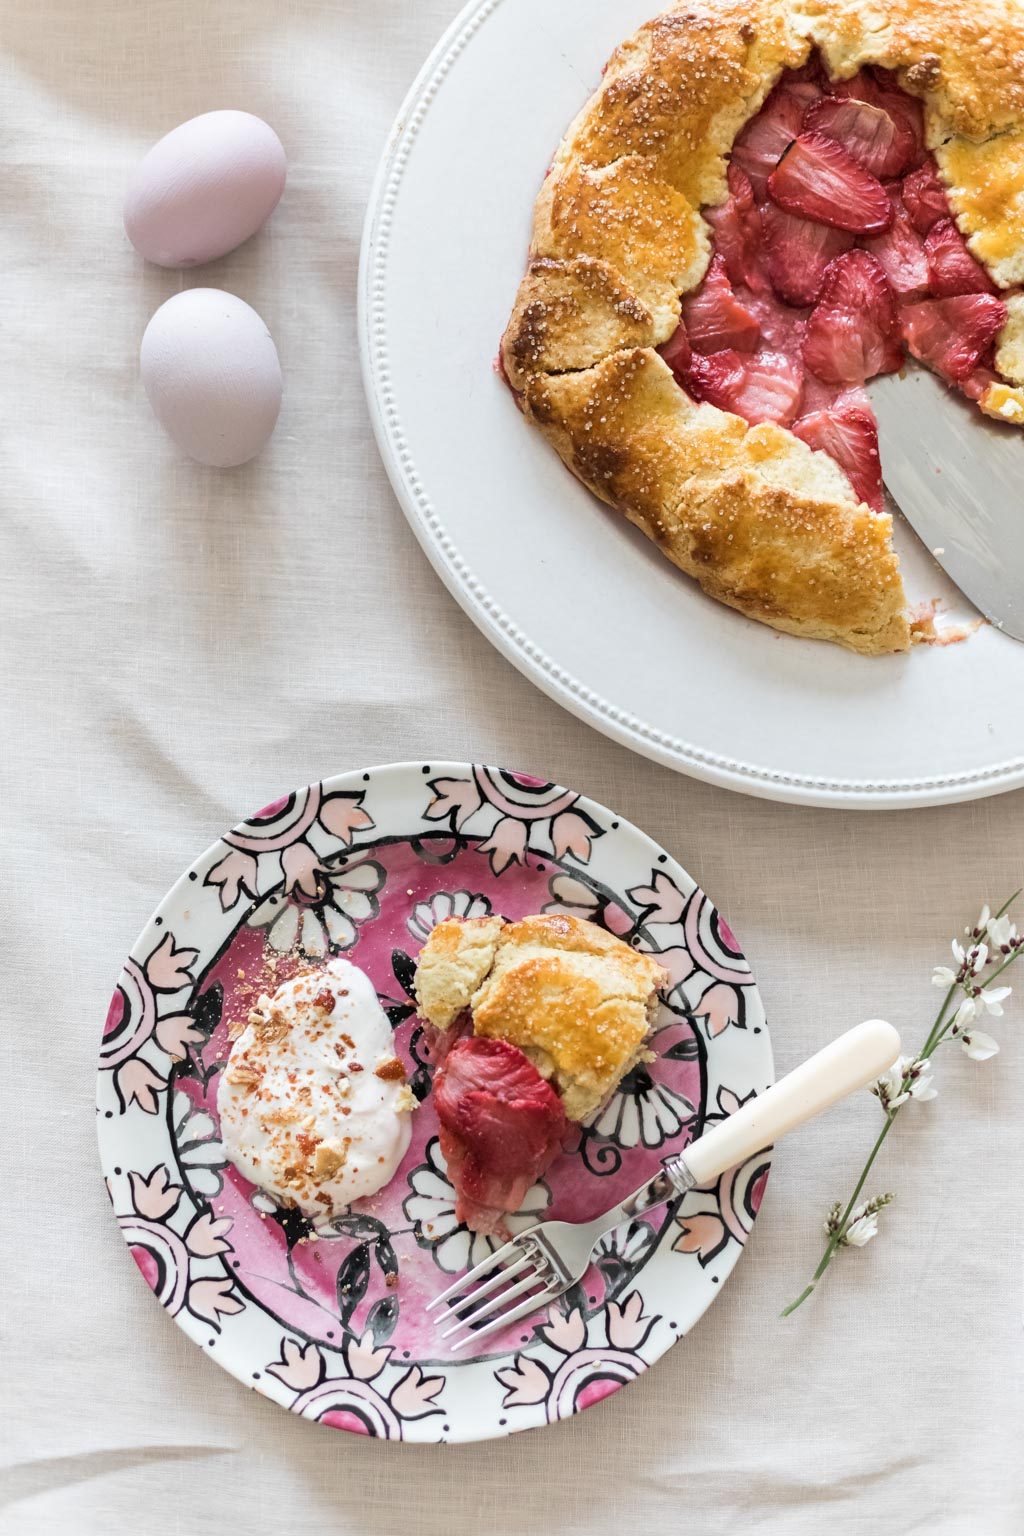
Roast strawberry galette with strawberry, honey and orange ripple
cream
A galette is such a forgiving way to bake fruit and is perfect for
anyone who feels a tart is too stressful. When strawberries are in season,
there is little that needs to be done to them. When they are just coming into
season they can be a little watery and in need of a bit of help. Roasting them before
you make the galette, forces out some of the water, leaving behind a more
concentrated jammy flavour. It also means you won’t be faced with a damp tart
base.
The strawberries can be roasted ahead of time and the pastry can
be made ahead and frozen. Any leftover strawberry juice is lovely in a cocktail
or a G&T.
The galette is best served warm or at room temperature as it can
crumble when it is hot. You can make it earlier in the day and just leave it,
covered away from sneaky fingers, out of the fridge until you’re ready to eat.
If you prefer, don’t make the cream and serve the warm tart with vanilla ice
cream.
Ingredients (serves 6)
500g strawberries
180g (6 oz) plain flour (all purpose in the US)
90g (3 oz) cold salted butter, cut into thin slices
50g (1 ¾ oz) golden granulated sugar
1 orange
40 g (just over 1 oz) ground almonds (almond meal in the US)
A pinch of sea salt flakes
2 – 3 tbsp cold water
1 egg yolk
2 teaspoons granulated sugar
400g (28 oz) creme fraîche
1 orange
1 teaspoon runny honey
To make
Pre-heat the oven to 200°C (180°C fan) 400°F (350°F convection).
Cut the green ends off the strawberries then halve or quarter them and lay them flat in a large baking dish. They will release a lot of juice as they cook so be sure to choose a dish with sides. Put into the oven and roast for an hour, shaking once and pouring any juice off into a small bowl half way through.
Make the pastry – put the flour, sugar, butter, orange zest and a large pinch of salt into a food processor and blitz until you have fine crumbs. Then gradually add the cold water, pulsing as you do until the dough comes together into a ball. Flatten the dough and wrap in parchment before putting in the fridge to rest for an hour or overnight.
When you’re ready to assemble the tart, roll the chilled pastry to around 5mm (¼ inch) thick. I find it easiest to roll it out straight onto a silicone liner or parchment lined baking sheet.
Picture a circle that stops around 3 inches from the edge of the rolled out pastry and scatter the center of the imaginary circle with the ground almonds.
Shake off as much of the juice as possible and lay the roasted strawberries on the ground almonds in circles, starting at the inside and working out. Stopping 3 inches from the edge of the pastry.
Gently fold the pastry edges over so that the outer edge of strawberries are covered but the inner strawberries remain exposed. If any pastry rips, just squish it together.
Brush the pastry with a beaten egg yolk and scatter a teaspoon of granulated sugar over before baking at 200°C (180°C fan) 400°F (350°F convection) for 40 minutes or until the pastry is dark golden brown. Leave to sit on the tray for 30 minutes before serving.
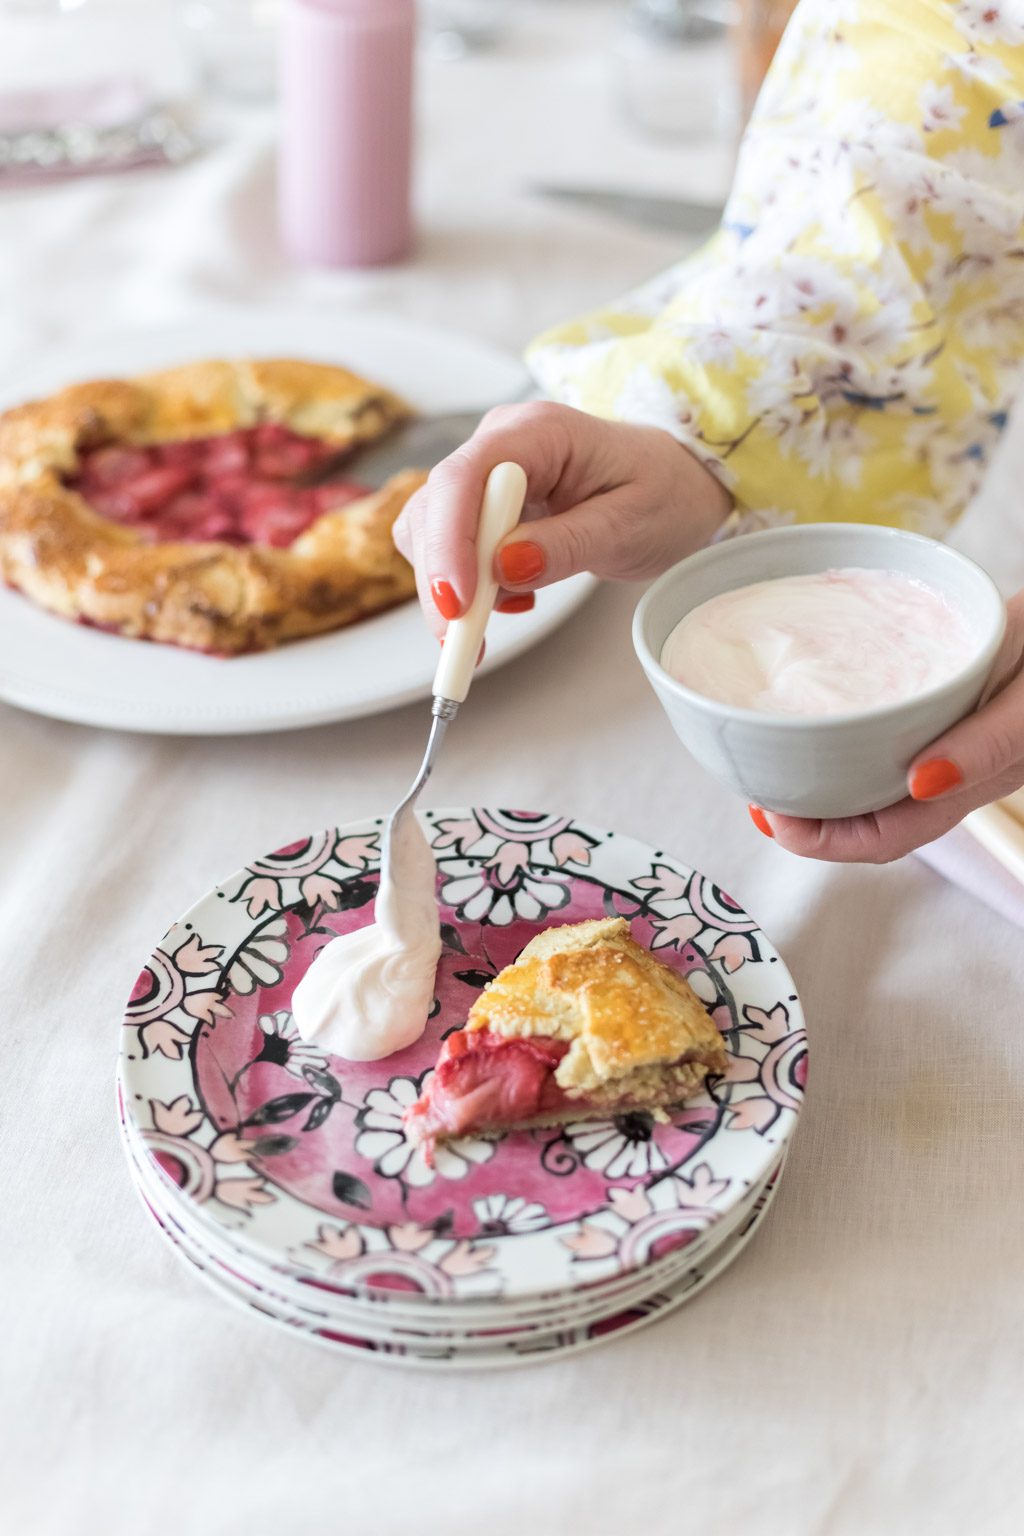
To make the ripple cream, put the crème fraiche into a bowl and mix in the zest of an orange and the honey. Then spoon a couple of teaspoons of the strawberry juice that you set aside earlier and use the end of a knife to ripple it through the cream.
To serve, cut the tart into wedges, slide a fish slice or palette knife underneath to separate it from the parchment and serve with a blob of the flavoured cream.